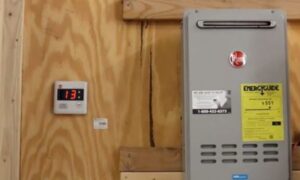
Rheem tankless water heater code 13 is mainly the error indication of incomplete combustion in the system due to a dirty or broken flame sensor. Apart from this, the error can be caused by a variety of reasons. Like:
- Clogged or incorrect ventilation
- Non-functional blower motor
- Interruption in gas supply
- Wrong altitude settings
- Poor or no ground connection.
When the Rheem error code 13 triggers, inspect the flame rod 2 for any soot build buildup and clean it properly. Clean the exhaust venting and air intakes as well to ensure that the exhaust out the system. Also, ensure proper altitude settings of the unit, reflecting your location and the gas supply is normal.
Keep on reading to explore all the factors clearly in eliminating the error code 13 from your Rheem model.
Table of Contents

What Does Error Code 13 Mean In Rheem Tankless Water Heater?
Rheem tankless error code 13 mainly implies that the flame rod (FL #2) is detecting poor combustion in the system. Or if we clearly say, the unit is going through an imperfect combustion issue.
Combustion is mainly a rapid chemical reaction that occurs with a mixture of fuel and oxygen in order to produce heat in the system. Now when there is an imbalance of oxygen and fresh air in the combustion chamber, the unit will start producing harmful carbon monoxide (CO) in larger quantities.
When the flame sensor senses that there are inequalities of fresh air in the system and also the outgoing vent is not correct, it displays the error code 13 in the LED display on the remote control as diagnostic information.
The code will frequently appear if you are not inspecting your system regularly and are unconscious to routinely clean out the flame rod, burner, and many other essential parts.
But, apart from the dirty or defective FL #2, various factors contribute to this error. Like improperly installed venting, poor grounding connection, incorrect altitude settings, non-functional blower motor, and many more.
Rheem Tankless Water Heater Code 13 [Quick Overview]
From my own experience, I’ve discovered that a few particular issues lead to Rheem error code 13. For your convenience, I’ve mentioned all the possible reasons and recommended fixes through this quick table.
So, let’s dive straight to it before getting to the details:
| Probable Reasons | Recommended Fix |
| Blocked ventilation | Visually inspect venting for possible blockage or recirculation of exhaust. Clean the exhaust vent and air intake properly. |
| Dirty or broken flame rod | Clean the soot buildup on the sensor rod. Test sensor resistance and replace it if necessary. |
| Clogged or defective blower motor | Clean the fan motor. Replace if it is not operating as it should. |
| Gas supply | Clean the fan motor. Replace it if it is not operating as it should. |
| Improper altitude setting | Adjust the altitude setting according to your heater’s location. |
| Improper grounding | Check and fix the faulty grounding connection to your water heater. |
How Do I Fix Error 13 On Rheem Tankless Water Heater? [Easy Solutions]
Now start reading this effective troubleshooting chapter to disclose all the simplest fixes, tips, and tricks to eliminate the Rheem tankless water heater error code 13 from your remote display.
1. Clogged Or Incorrect Ventilation
In the case of poor combustion in a tankless water heater, malfunctions from the ventilation would be the first culprit to blame. In this instance, the best chances are both air intake and exhausts are blocked by debris.
There would be birds or insects next, blocking the ventilation system. Aside from blockage, you may experience combustion issues due to using incorrect vent material, terminations, or lengths.
So if you suspect venting is the core reason for this issue, you need to visually inspect the ventilation and check for blockages or obstructions first.
How To Fix:
Safety first! Thus start by turning off the power supply to your water. Unplug it from the power connection or flip the circuit breaker to the “Off” position. Also, turn off the gas and water supply to the unit.
Precaution: It’ll be highly better if you put your gloves, eyewear, and any other dust protection for cleaning purposes.
- When all is done, inspect the venting pipes first. Check for the possible blockage or recirculation of exhaust due to debris, rust, or corrosion.
- Taka vacuum cleaner with a hose attachment and insert the extension hose into the blockage area. Try to suck up any debris that you might see.
- Use a vent-cleaning brush or broomstick to nudge out the stuck debris like bird nests, ice, dust, or natural debris and shoot from the vents.
- If something that you notice is harder to reach, use a plumber snake or plastic hook and clean out the debris that falls back down the pipes.
- After vacuuming, wipe down the pipe’s interior using a clean cloth dampened with a suitable cleaning solution. If the exhaust vent of the tankless system is rusted, corroded, or warped, you need to replace it.
In case, you suspect that the ventilation pipes aren’t correctly installed, speak with a professional right away. Keep note that, vent termination must need to be installed according to the instructions of the manufacturer.
2. Non-functional Blower Motor
After clearing the ventilation system of your tankless water heater still, there is the same error code 13 on the remote display, be sure your unit has the combustion issue yet. This might be occurring due to the malfunctioning blower motor.
The blower motor is an essential element in a tankless water heater that is designed to push the exhaust and excess heat through the system. In case the blower motor dies or fails, it won’t pass the exhaust gases from the unit which interrupts in pulling of combustion air as well.
That results in triggering the error code 13 on the control display. Due to a failed blower motor, your tankless unit may get overheated and shut off at times as a safety measure
How To Fix:
Before inspecting the blower motor, make sure you’ve turned off your water heater first. Turn off the gas and water supply as well.
Unscrew the front cover and set it aside. Now follow the DIY instructions below which I often applied to examine the fan motor of my Rheem unit:
i) Locate The Blower Motor
As for the first step, you need to access the blower motor that is behind the control board. Thus unscrew the control board and let it hang down. Now, remove the screw holding the blower motor with the heater housing. Pull out the motor from the assembly.

ii) Clean Out The Blower Motor
Take a dampened cloth and remove the stuck debris on the motor. Also, vacuum out the dirt and debris from the blower housing as well. Test the fan motor manually to ensure that it is running freely.

The motor should run with a very small amount of restriction. If not, you’ll need to replace it.
But if there is all well with the fan motor, move ahead to the next steps to test it electrically.
iii) Check For Proper Voltage To the Blower Motor
Now in this step, check the check wiring harness to the motor for any damage or loose connection. Tighten or fix the loosened wiring connection.
After that, restore power to the unit. Plug your tankless water heater back into the power connection and press the power button on the remote control.

Now locate the Molex connector “G” on the control board. Remove and reinsert the connector. Now, take a volt-meter and check for voltage in the connector to see whether it’s working or not.

- First off, test DC voltage across black and red wires on connector “G” for 144 – 192 DC VOLTS.
- Next, press the press and hold down the “MAX” button on the control board to activate the blower motor. While the blower motor is running, test DC voltage across black and white wires on connector “G” for 12 – 18 DC VOLTS.
- Finally, measure the voltage across black and blue wires and it should give a reading in between 4 – 10 DC VOLTS. If not, be sure your blower motor is faulty and you need to replace it. Seek professional help to replace the bad blower motor.
3. Gas Supply Issue
If you have a gas-operated tankless water heater, a sufficient fuel supply is major for proper combustion. In case there is an interruption in the gas supply, you will get poor combustion, triggering the error code 13.
Now there are various factors responsible for the gas supply issue in your water heater. Like:
- Using the wrong type of gas
- Incorrect gas pressure
- Gas shut-off valves are not opened all the way
- Gas pipe size and flex line aren’t supported by the BTU rating
- Air in the gas line
- Blocked gas regulator
How To Fix:
Start by ensuring the use of the right type of fuel for your tankless water heater. Usually, Rheem tankless water heaters require either natural gas or propane for ignition. So, go through the manual for your Rheem model and ensure the right gas type for your unit.
Now, check out the propane tank to see that there is sufficient gas to run the unit efficiently. Also, measure the gas pressure and ensure that the correct pressure is being applied. If not, adjust it accordingly.

Inspect the gas lines for any blockages or obstructions that are present. Clean it. Also, bleed the air from the gas line to allow the gas to flow to the unit fluently.
Besides doing all these make sure that the gas lines are sized properly to support the BTU load of your water heater. This is crucial as a small gas supply line can easily lead to incomplete combustion. If you’re not getting enough about this, we’ll recommend calling a professional to do this task for you.
Finally, ensure that you’ve opened the gas shut-off valves all the way. Check the valve lever is perpendicular to the gas line.
4. Improper Altitude Settings
Incorrect altitude setting is one of the major reasons for error code 13 on the Rheem tankless water heater remote display. This mainly relates to improper installation of your water heater.
Basically, if you install your tankless water heater above 3,280 ft. (1,000 m), you need to change the setting in the DIP switch located on the printed circuit board (PCB). Otherwise, your water heater may not function properly.
How To Adjust The DIP Switch On The PCB For High-Altitude Installation?
At this step, you have to verify the altitude settings of your water heater and change it if necessary. To do so, follow the below simple steps:
Step #1: Start by turning off the gas and water in the water heater by closing the shut-off valves. Next, remove the front cover panel on the water heater.
Step #2: Head over to the control board and locate the DIP Switch 2 on the top-right portion of the board, you may find the switch labeled as DIP 2.
Step #3: The switch might be in the “Off” position as a defective setting. If your water heater is installed above 3,280 ft. (1,000 m) and below 6,560 ft. (2,000 m), change the switch setting to the ON position (UP). Do not alter any other DIP Switch.
Step #4: Change the DIP switch #4 setting of DIP 2 to the “ON” position if the water heater is installed above 6,560 feet (2,000m) and below 9,840 feet (3,000m). You will find the manifold pressure will be reduced accordingly
Step #5: Finally, attach the unit’s front cover. At the same time, turn on the gas shutoff valve and water shutoff valve.
5. Malfunctioning Flame Rod
A defective flame rod can be one of the big reasons for triggering the error code 13 on the Rheem tankless water heater. The best chances are either the sensor is clogged with the carbon buildup or defective at all.
The flame rod on a tankless water heater is designed to convert the heat from the burning flame to a small current and initiate the ignition process. As for always contacting the flame, building up soots on the metal rod is quite obvious if you’re not ensuring regular maintenance of it.
When the flame sensor becomes corroded due to carbon buildup, it fails to sense the flame from the burner and that leads to incomplete combustion in the system. As a result, you catch the error code 13 on the Rheem display.
How To Fix:
As for the first step, you need to inspect the flame sensor rod and clean it properly. For instance, make sure you have unplugged your unit from the power supply first. Now, remove the front access panel and locate the flame sensor rod-2 from the sensor assembly.
Clean the Flame Sensor: Take off the electrical connector by gently pulling it off. Now unscrew the flame sensor rod from the connector using the Phillips screwdriver.

When done, take a fine-grit paper and clean the sensor rod to remove all buildup soots.
After cleaning, reinsert the sensor rod back in place and then ensure a snug connection if it. In case of a broken flame sensor rod, you need to replace the flame sensor.
But before that, test the sensor wiring electrically. Here all how you will do it:
- Locate the white connector “M” and blue connector “T” on the Control Board. Remove and reinsert the connection first to ensure there is no loose connection.
- Now, check out the AC voltage on the connector and it should give a reading of 1 – 100 AC VOLTS.
- If the voltage is OK, cycle the unit on and activate the maintenance mode. That’s the moment, you will see code 05 on the remote display.
- In case of any single malfunction on the voltage reading, you may need to replace the sensor connector or at times control board itself.
6. Improper Grounding
To the fact of improper combustion, leading to error code 13 on the Rheem tankless water heater, a higher possibility is that your unit isn’t properly grounded. Though grounding a gas-fired water heater isn’t necessary unless it is recommended.
Mainly grounding is required to provide protection against a surge in voltage that could damage the system.
Anyway, when installing the Rheem tankless water heater, ensure it is electrically grounded according to the manufacturer’s instructions. Otherwise, various problems will appear including the malfunction in the combustion system as well.
How To Fix:
Inspect your tankless water heater for ground connection. Verify the unit is electrically grounded. In this instance, you need to access the control and locate the green ground wire connections on the lower left side of the PCB.
Visually inspect the connection and make sure it is properly connected and not damaged. If needed, seek professional help to handle the task.
7. Perform A Hard Reset
After ensuring all the above troubleshooting procedures, head over to the remote controller for any error code. If still the error code 13 appears and the unit shuts down 5 times within a 4-hour period while running the code, be sure it is time to perform a hard reset in the system.
Here is all how you hard reset your Rheem tankless water heater:
How To Reset Hard Lockouts For Error Code 13 On Rheem Tankless Water Heater?
Go through the step-by-step process to reset:
Step #1: Start by turning off the remote control first. But leave the unit plugged into the power connection. Now unscrew all the attached screws and remove the front cover.
Step #2: Locate the Dip switches on the upper right corner of the control board.
Step #3: Find out the Dip1 – Switch #2 from the switch assembly and turn it to the On position. When done, immediately turn it to the Off position again.

Step #4: Now within 5 seconds, press and hold the MIN and MAX buttons. Keep holding the buttons simultaneously for at least 2 seconds
Step #5: At that moment, the LED will flash “UL” and then it will go solid. This indicates that the water heater has been reset. Release the button.
Step #6: Turn the remote control on by pressing the Power button.
After eliminating the fault you may need to clear the fault history from the remote display. To do so, here is the simple procedures to follow:
Step #1: Now locate the Dip switches on the upper right corner of the control board. Before heading over, make sure all are in the Off position.
Step #2: Locate the Dip1 – Switch #1 and turn it to the On position. Then immediately turn it to the “Off” position again.

Step #3: Press the MIN or MAX button within 5 seconds. You need to keep pressing the button for at least 2 seconds.
Step #4: Right then, you will see the “CL” flashing on the display and then it will go solid. This indicates the fault history has been cleared. Now release the button.
Step #5: You can verify clearing history by entering Maintenance Mode and checking the code at location 1E. It should give the reading NULL in two dashes (–) signs.
Step #6: Finally turn on the remote control and start operating the unit again.
FAQs:
What to do if my Rheem tankless water heater keeps shutting off?
Your Rheem tankless water heater will keep turning off if there is any loose or damaged wiring connection in the system. Inspect the unit and fix the loose wiring. Also, ensure a minimum water flow to the unit and that the system isn’t overloaded.
Why is my Rheem tankless water heater leaking from the bottom?
Your Rheem tankless water heater leaks mainly when there is a high water pressure in the system. Also, hard water build up, loose water pipe connection or poor ventilation can also be some of the major reasons for this issue.
What does error code 12 mean on Rheem tankless water heater?
Rheem tankless water heater code 12 is mainly an error, signing you flame failure in the system. This occurs due to dirty or broken flame sensor rods, insufficient gas supply, blocked venting, defective gas control valves, and many more factors.
In Closing
While operating the water heater, encountering several error codes on the digital display is quite common for Rheem users. Each code defines different issues that are running through the system.
Unlike other codes, Rheem tankless water heater code 13 is very common to the user indicating a problem with the unit’s combustion chamber. There are various factors that are related to this issue. Luckily we have described each one very clearly throughout our guide with the simplest solution.
Proper maintenance is the key to preventing incomplete combustion in any gas-fired appliance. Thus you need to be conscious about regularly maintaining your water heater as well.
To get how you will do so effectively, you can check out our detailed Rheem tankless water heater maintenance guide thoroughly.