
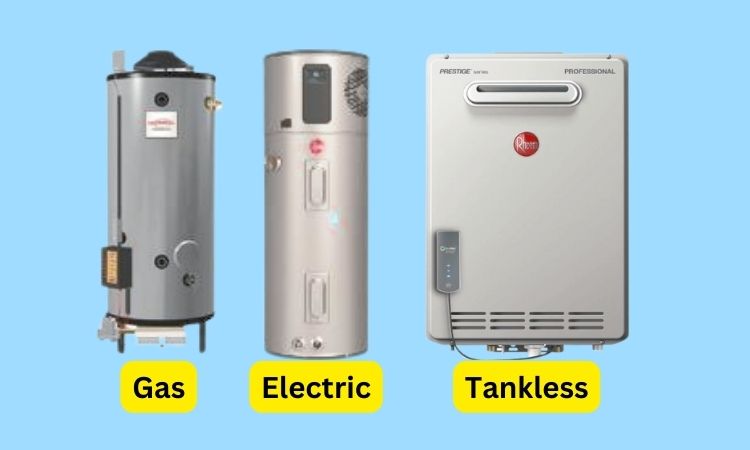
From my personal experience, I can tell you that some Rheem water heater maintenance procedures are common for both gas and electric water heaters. They are:
- Flushing the heater at periodic intervals.
- Inspecting the anode rod annually and replacing it when needed.
- Draining the water heater during long periods of shutdown.
- Operating the T&P valve periodically.
Even tankless water heaters require proper maintenance. Improper operation can cause carbon monoxide dangers, excessive water temperatures, and other potentially hazardous conditions resulting in death, personal injury, or product damage as well.
Besides that, some maintenance tips only work for gas water heaters. For example, inspecting the pilot light, main burner, and venting system. Similarly, checking the heating element and thermostats are different for electrical water heaters.
I’ll discuss all of these maintenance practices of all types of Rheem water heaters in detail in this guide. You can use them to extend the longevity of your water heater. So, let’s dive in!
Table of Contents
Rheem Water Heater Maintenance [Gas & Electric Units]
Maintaining your water heater properly is essential as it extends the lifespan of the water heater. Besides, it improves the energy efficiency of the water heater and ensures that it works safely.
01. Flushing The Heater
Sediments will settle at the bottom of your water heater’s tank with time. It comes with the water that goes into your tank. So, the more the hardness of the cold water, the more sediments will be deposited in the tank.
In the short run, this build-up of sediments will reduce the energy efficiency of the water heater. But that’s not all. If you ignore this issue, the sediments can clog the drain valve. When that happens, it’ll be hard to get the sediments out.
The absolute worst-case scenario is that the sediments will start to corrode the tank. When it gets severely corroded, the tank will develop cracks. So, it’ll start to leak water and you’ll have to replace your water heater.
The good news is that you can easily solve all these problems by flushing your water heater at regular intervals. Follow these steps to do it:
- Turn off the gas supply to the heater if you’re using a gas heater. If you’re using an electric water heater, turn off the power to it by flipping the breakers.
- Attach one end of a garden hose to the drain valve at the bottom of your water heater. Run the other end of the hose to the nearest floor pan or outside your house if you want.
- Shut off the cold water supply and open a hot water faucet to release the pressure inside the tank.
- Drain the tank until you get clear water coming out of it that doesn’t have any sediments. You can also drain the tank all the way until water stops coming out of the garden hose. It’ll be more effective.
- The sediments will go out through the garden hose. You can then close the drain valve and remove the garden hose.

Hopefully, you get the idea of how to flush your water heater. But if you need more insight into it, check out my Rheem water heater flushing guide for detailed instructions about this process.
You may be wondering how often you need to flush your heater. Although the general answer is once or twice a year, it can vary a lot. It depends mostly on the hardness of the water. But it could also be affected by the condition of the water heater and the amount of hot water used.
Luckily the guide contains tips on how you can find out exactly how often you need to flush your water heater. All it’ll take is a pair of stockings and a rubber band. You’d have to do some trial and error to find out the perfect flushing frequency. But you’ll get there soon. Visit the guide to learn more about it.
02. Inspect The Anode Rod & Replace It When Required
The anode rod is a device that protects the tank from being corroded. You already know that hard water can damage the tank. That’s why it’s important to flush the tank at regular intervals.

But the anode rod already minimizes the damage to the tank. It does so by attracting the sediments to itself. So, the anode rod itself gets damaged while the tank is protected.
As the anode rod itself gets damaged, you’d have to replace it when that happens. The right time to replace the anode rod is when more than 6” of core
wire becomes visible.
You should inspect it every year and replace it at the right time. If you do a few replacement jobs, you’ll understand how often you need to replace the anode rod. Based on my experience, you’d most likely be replacing the anode rod once every four years or so.
It can be more or less depending on the hardness of the cold water supply. If you’re worried that you don’t know how to replace the anode rod, don’t worry. I got you covered.
How To Replace The Anode Rod In Rheem Water Heater?
Replacing the anode rod is a simple job that you can do on your own. Here are the tools you’ll need to replace the anode rod:
- The right replacement anode rod.
- Socket wrench.
- 1/16” wrench.
- 24” cheater bar or pipe.
- Flat blade screwdriver.
- Teflon tape or pipe sealer.
- A garden hose.

Once you have managed the right tools, you can follow these steps to replace the anode rod in your heater:
Step 01 – Drain The Water Heater
Turn off the circuit breaker to shut off the power supply to the heater in electric heaters. You have to turn off the gas control thermostat in gas water heaters. Wait for the heater to cool down a little. Close the cold water inlet shutoff valve and open a hot water faucet.

Drain the water from the tank following the flushing instructions. You only have to drain roughly 2 gallons of water from the tank when you want to replace the anode rod.
Step 02 – Locate & Remove The Anode Rod
The anode rod will be under one of the plastic caps at the top of the water heater. Locate its position. You can look at your owner’s manual or call Rheem tech support if you can’t figure out where the anode rod is. Here’s a picture of where it’s at in a Rheem electric water heater:

The anode rod may also be exposed in some of the older models. Remove the plastic cap to expose the anode rod. If it’s not visible down to the tank shell, remove the insulation with the flat-blade screwdriver. That should expose the head of the anode rod.
Use the 1/16” wrench to turn the anode rod counterclockwise and remove it. Keep a rag close to you as you do that as some water will seep out when you remove the anode rod.
You’ll need a cheater bar to apply enough leverage to break the initial seal on the anode rod in most cases. That’s because the anode rod is usually installed tightly in its position.
Have someone hold the tank if it moves as you try to remove the anode rod. Once it comes loose, pull it out. You should wear gloves when you remove the anode rod as it could be hot.
Step 03 – Install The New Anode Rod
Cut the anode rod to the right length if it doesn’t match the length of the old one. Apply Teflon tape to the threads of the new anode rod. You should wrap it for at least 6 turns or more to create a tight seal. Then, set the new anode rod in the right position with your hand.
If the new anode rod won’t go in easily, the space above your water heater is too tight. You’ll need a flexible anode rod in that case.
Next, turn on a hot water faucet and open the cold water supply valve. Let the tank get filled and turn off the hot water faucet when it has a steady stream of water. Check for leaks around the new anode rod.
If there are no leaks, you’ve done a great replacement job. You can put the plastic cap back on and complete the installation. If there are leaks, tighten the anode rod more until no water leaks out.

Then, you can turn on the power supply in electric heaters and the gas supply in gas heaters. Check whether the anode rod is leaking after 24 hours. If there are no leaks, you can rest assured that you’ve done a perfect anode rod installation. You can put the plastic back on after that.
That’s how easy it is to replace the anode rod. Keep in mind that it’s absolutely essential to replace the anode rod at the right time. If it gets depleted, the sediments will directly attack the tank. So, the tank will get corroded and develop cracks.
Eventually, it would start leaking and you’d have to replace the entire water heater. It’s a hell of a consequence to bear that you can easily avoid by replacing the anode rod.
03. Drain Heater When Going On Vacation
If you are going on a vacation when it’s cold, you must drain the tank. If you only turn off the heater without draining the tank, the water will get frozen. So, you’ll have ice in the pipes and possibly in the tank. You can avoid all these issues by draining the tank before you leave.

Besides that, you may also live in an area where you only use the heater periodically. If you won’t be using the heater for a long period, you should drain the tank as well. More importantly, you should make sure that the power supply to the heater is turned off.
It’ll be better for conserving the energy of the water heater and also preventing the build-up of hydrogen gas. For electric water heaters, you only need to drain the tank and shut off the power supply.
If you intend to use your heater after a long shutdown period, check if everything is working properly. It’s better if you can hire a qualified technician to do the inspection. But you can do it yourself too.
Keep in mind that you should only turn on the heater after you’ve completely filled the tank with water. So, turn on the cold water supply valve first and fill the tank. Then, you can restore the power and gas supply to the heater.
04. Operate The T&P Relief Valve Periodically
It’s also a good idea to manually operate the T&P relief valve once every month. Get rid of a few quarts of water to reduce the build-up of sediments inside the tank of your water heater.

You can place a bucket under the discharge tube connected to the T&P valve when you operate the valve manually. The water will be hot when it comes out of the discharge tube. So, make sure that there’s no around the heater when you operate it.
If you don’t have the time or willingness to do that, you should at least check the T&P valve once a year. Just drain the water from the top part of the tank and make sure the water is below the level of the T&P valve.
Then, you can pull the lever manually and see if the valve is working properly. Doing this periodic check should reinstate your peace of mind. The T&P valve is an important safety device that keeps the tank from exploding. So, it should be functional at all times and you should check it as often as you can.
05. Inspect Water Heater Connections
Check the water heater pipe connections at the top of the water heater. Look for signs of corrosion in them. If any of the pipes are corrected, water could be leaking from them. Make the necessary repairs to control this issue.

Rheem Water Heater Maintenance [Only Gas Units]
I’ve discussed the right way to maintain your heater for the points that are common in both gas and electric heaters. But there are some maintenance tips that only apply to gas water heaters.

You can improve the performance of your heater over a long time by following the right practices. Here’s a quick look at these tips:
i) Clear Obstructions Around The Water Heater
Make sure the airflow to the water heater is never obstructed. If the heater doesn’t get sufficient air, the burner won’t work properly. The area around the water should be free from any obstructions.
I recommend keeping at least a foot or two of distance between the heater and the nearest object around it. Moreover, make sure that no combustible materials or flammable vapors are around the heater.
If there are any paint fumes or vapors around the heater, the flammable vapor sensor will get tripped. It’ll shut off the heater operation and put it in a lockout. I have a dedicated Rheem FVS guide if you want to learn more about it.

Don’t use any water heater blankets for gas water heaters. They can mess up the operation of the gas control valve and block the air intake openings.
ii) Check The Pilot & Main Burner
Visually inspect the pilot light and the main burner at regular intervals and observe the flame pattern. If there are any issues with them, you need to correct them.

You can inspect the pilot light individually when the main burner is turned off. Look through the sight glass and see if the pilot flame and the ignition system are working properly. Check out my Rheem pilot light issues guide if you’re facing any issues with the pilot and want to solve them.
Besides the pilot light, the main burner will also get dirty with time. The build-up of carbon deposits on it will prevent it from burning properly and reduce its efficiency.
So, pull out the main burner and clean it from time to time. You can even use a mild detergent on the burner to get the dirt out of it. Clean the floor shield inside the heater using a vacuum cleaner as well when you remove the burner. If you do these things, your gas water heater will stay in top-notch condition.
iii) Check The Venting System
Inspect the venting periodically and make sure the connection between the draft hood of the heater and the vent pipe is secure. The vent pipes would most likely be hot.

So, wear insulated gloves when you check them to protect your hands from burning. If the connection is loose or corroded, you’ll have to replace it. Turn off the water heater and move the objects away from venting before you start the replacement procedure.
You should at least inspect the venting system once a year. The passageways should be free and unobstructed. Make sure the vent connector is properly attached to the heater and sitting in the right position. If you find any debris, get them out. If the connection is loose, tighten it.
Sometimes, you may find soot in the venting system. That’s a serious issue and you should be immediately alarmed if you see that. Call your local gas supplier about the issue and take steps to fix it.
The flue baffle will have to be cleaned or replaced. Make sure there’s no spillage at the draft hood relief opening after operating the burner. You can light a candle or match to do this test. If everything checks out, you can continue using your Rheem gas hot water heater.
Rheem Water Heater Maintenance [Only Electric Units]
Just like gas heaters, there are some maintenance points that are unique to electrical heaters. The good thing about electric water heaters is that they don’t need as much maintenance as gas water heaters.

But you should still follow the right practices to get the most bang for your bank from these heaters. Here are some tips you should follow to maintain your electric water heater properly:
i) Turn Off The Circuit Breaker Earlier
Whenever you do any maintenance work on your heater that requires draining the water, shut off the heater earlier. Turn the breaker that supplies power to the heater to the “Off” position at least a couple of hours before you drain the heater. It’s an essential step to protect you from scalding.

If you don’t do that, you could come into contact with exceedingly hot water that’ll burn your skin. Turning off the heater also makes sure that you won’t face any electrical shocks when using the heater.
ii) Check Electric Components
You should decide on a periodic interval to inspect the electrical components inside the heater. Especially, the two thermostats and the heating elements inside the water heater. I’ll walk you through how to check them.
How To Test Rheem Electric Heater Heating Element?
Let’s start with the heating element. You’ll need a multimer to test it. Follow these steps to test the heating element:
- Turn off the power supply to the water heater by switching off the circuit breaker. Make sure you give the water heater ample time to cool down.
- Undo the screws holding the access cover in place. Then, remove the cover and unfold the insulation.
- Remove the plastic cover in front of the thermostat so that you can access the heating element screws.
- Connect the probes of the multimeter to the screws in the heating element.
Observe the reading in the multimeter. A heating element that reads between 10 to 16 Ohms in this test is a healthy one. If your heating element is outside that range, it means the heating element is faulty. You’d have to replace it in that case.

Make sure you check both the heating elements if your heater has two of them. The process for checking it is the same. You can check out my Rheem electric water heater problem-solving and repair guide. I’ve covered how you can replace the heating element in detail in that guide.
How To Test The Thermostat In Rheem Electric Heater?
You know how you can test and replace the heating element. You also need to test the thermostat to make sure the heater is working properly. Here are the detailed instructions on how you can test the thermostat:
- Turn off the power supply to the water heater and wait for it to cool down. Then, remove the covers and unfold the insulation to access the thermostat.
- Set the dial of the multimeter to check for continuity. Remove the connections between the wires and screws. Now, you’d have to check two screws at a time to test the continuity. If there’s no continuity at any point in any of the next steps, you can conclude that you have a faulty thermostat with certainty.
- First, check the two top left screws. The black lead will go on the one that’s at the top and the red lead will go on the one below that. Similarly, repeat these steps for the two top right screws.
- Check the common terminal with the upper heating element screw. There should be continuity if the water temperature inside the tank is lower than the desired point.
- Check the common terminal with the lower element screw by following the same process. It should have continuity if the water temperature inside the tank is higher than or equal to the desired point.
- Only one of the two heating element screws should have continuity. If both of them have continuity, you have a faulty thermostat. If none of them have continuity, you have a bad thermostat as well.

If your thermostat has passed all these tests, you can rest assured that it’s right. Make sure you check the wiring connections as well. If any of the wiring connections are loose, tighten them. If any of them are damaged, you’d have to replace them.
Rheem Tankless Water Heater Maintenance [Expert’s Suggestions!]
Just like tank-style water heaters, tankless water heaters also need periodic maintenance. Let’s dive deep into how you can maintain your Rheem tankless water heater.
I’ve prepared a quick checklist that you can follow to maintain your water heater. Before heading over to the details, check this table as it’ll help you stay on top of things. You’ll know how often you’d have to do some maintenance jobs on your water heater.
| Inspection Schedule | What To Check |
| Daily | Clean out the heater exterior Inspect the condensation trap |
| Monthly | Drain your tankless water heaterCheck for water leaks Remove the stuck grime from the water filter and air inlet filter screen. |
| Annually | Descale and flush your water heater to remove sediment build upInspect the venting linesInspect and clean out the burner Check the condition of the pressure relief valve. |
How To Maintain Rheem Tankless Water Heater [According To Experts!]
Here is the ultimate description of the needed procedures to maintain the Rheem tankless water heater maintenance on its scheduled days.
Regular Maintenance:
i) Clean The Heater Exterior
To enjoy the full benefits of this energy-efficient device, it is essential to ensure the proper cleanness of your water heater. For instance, you need to clean the exterior, remote & the surrounding areas of your water heater regularly.
Here’s all how you will do it perfectly:
As mentioned above, first up, make sure you’ve turned off the power supply to your water heater first. Also, turn off the water and gas supply if it is a gas-powered model. Now start cleaning as follows:
- First off, take a vacuum cleaner and Remove any items, debris, or dust that are accumulated around the unit.
- Also, gently remove dirt, dust, and lint from the exterior of the water heater. Use a vacuum cleaner attached to a soft brush. While cleaning the exteriors, pay attention to the vent openings and clean out any visible blockages of the vents.
- Now, gently unscrew the front access panel and set it aside. Take a soft microfiber cloth and wipe away the accumulated dirt on the panel. If required, use a small brush to clean more precisely. This will help to protect the components inside the panel from dirt buildup.
- Wipe away the smudges or dirt collected on the remote control as well using a clean, damp rag. But overall, avoid excessive moisture or use of an abrasive cleaning mixture for cleaning purposes as it may damage the unit.
- Finally, let the water heater surfaces air dry naturally before restoring the electric & water supply.
ii) Inspect The Condensate Trap
As with cleaning the outer area of your tankless water heater, it is essential to inspect the condensate trap as well.
A high-efficiency condensing tankless model equips a condensation to extract the extra heat from the combustion gas using an additional heat exchanger. As the air blows over the heat exchanger, this largely water-vapored gas cools and condenses into a liquid state.
This condensate is generally acidic and causes damage to the plumbing in your home. Thus, it is essential to safely remove the acidic water (condensate) from the heater.
What To Do:
On a regular basis, inspect the condensate trap and ensure that there is enough water in the trap. Verify that the condensate is draining properly without any restrictions. Also, the condensate should be disposed of per local codes and regulations.
You will find the condensate drainage system at the bottom of the unit.

In order to clean it, simply remove the metal wire clip and then pull out the cap from the bottom of the trap.
Monthly Maintenance:
Well, that was your Rheem tankless water heater inspection routine that you need to perform on a daily basis. But that’s not enough here. Based on my long years on hand-on experience with Rheem water heater and from valuable insights from experts in the field, I’ve compiled a monthly maintenance routine for your water heater:
iii) Drain Your Tankless Water Heater
As per the manufacturer’s recommendation, you need to drain off your tankless water heater at least once a month. Draining a tankless system is an effective process to flush out this sediment, hard minerals, and other debris that may lead the unit to malfunction.
Here are the simple steps to explain how to drain your Rheem tankless water heater.
Step #1: Start by turning off the power supply to your tankless water heater. Press the power button on the remote control.

Wait for 10 seconds and unplug the unit from the power connection. You may disconnect the power supply at the circuit breaker box.
Step #2: Now, close the gas shut-off valve.
Step #3: At this stage, open all the hot water faucets for your water heater.

Let the water run until you are getting cold water. If so, shut off the faucets.
Step #4: Close the water shut-off valve as well. Now, head over to the water filter of your water heater.
Step #5: Unscrew it from the connection and take it out. Take a large container as the water will come out from the water inlet line.
Step #6: Now, connect a garden hose to the drain valve in the hot water outlet line. Also, place the other end in a suitable drain.
Step #7: Open the drain valve until all the water has drained from the water heater.
Essential Note: After draining the water heater completely, there would still be a small amount of water in the system. If it’s freezing weather outside, it’s quite obvious that this water can freeze and lead to big issues.
Thus, for instance, you have to run the defrost protection on the water heater for at least 30 minutes. This will effectively melt the frozen water, but it won’t operate properly until that water thaws out.
If you want to put the water heater back in service, just do the following:
- Close the drain valve and disconnect the attracted hose from the connection.
- Reinstall the water filter in the base of the cold water inlet line and open the water shut-off valve.
- Plug in the power cord or reconnect the power supply at the circuit breaker box.
- Open the gas shut-off valve(s) and press the POWER ON/OFF button on the control panel to restart the unit.
iv) Check For Water Leaks
Inspecting the tankless for any water leakage at least once a month should be added to your Rheem tankless water heater maintenance checklist. For instance, check all the water pipes for leaks. In general, the water pipes tend to get frozen in the freezing temperature and leads to the unit malfunction and leaks.
Due to that, the tankless water heater leaking at the bottom issue is very common to users who are living in colder climates.
Anyway, make a routine of once a month and check all the connections of the water heater. Make sure all of the pipes and fittings are tight and secure. If you suspect a loose connection, tighten them with a wrench.

If needed, it’s best to call in a professional to address the actual reason why your tankless water heater is leaking.
This effective precaution tip will protect you from the future possibility of dealing with any major issues relating to water leaks.
v) Clean Out The Water Filter
A water filter is an essential element of a tankless water heater that is designed to filter out any larger sediment coming out of the water supply. If this large particle is stuck, it will significantly restrict the overall performance of the water heater.

As always, due to the contract of the sediment, it tends to become caked with debris that blocks water flow. Even without proper attention, it will lead to a significant repair need.
To deal with this fact, you will need to kee