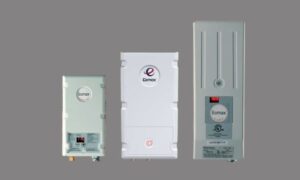
Just like you take care of your toys and gadgets, your water heater also needs some attention to keep working its best. But do you know about the Eemax tankless water heater maintenance guide?
You should do a check every year on the connections to make sure they’re okay. Also, after doing maintenance, get rid of air from the pipes. If your water is hard, you need to do more maintenance like regularly inspecting the interior of the unit for mineral buildup.
Well, it’s just a small part of the maintenance guide. In this guide, I’ll share my experience in maintaining Eemax water heaters. So, get ready to learn about the in-depth maintenance guide for Eemax electric water heaters.
Table of Contents
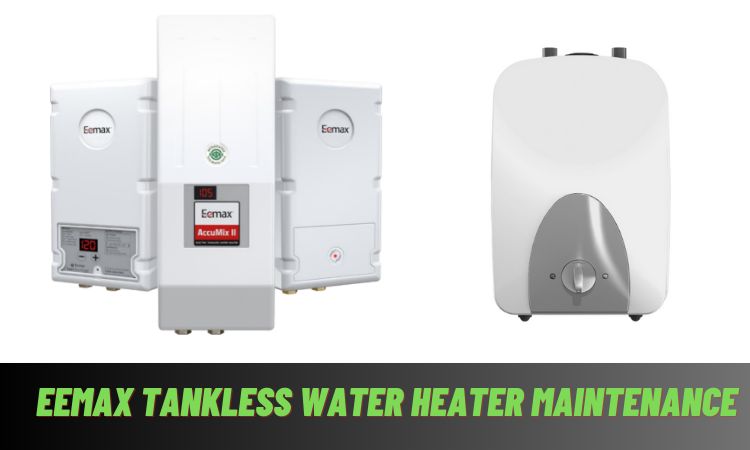
Eemax Tankless Water Heater Maintenance – General Guide
To ensure your Eemax tankless water heater operates at its best and to prevent potential issues such as water leaks, it’s crucial to perform regular maintenance. By following a few simple steps, you can extend the lifespan of your water heater and ensure its optimal performance.
This is the general guide to the maintenance of your Eemax tankless electric water heater. So it should be applicable for most of the Eemax models.
1. Annual Inspection of Connections
Regularly inspecting the connections on the inlet and outlet of your Eemax tankless water heater is a fundamental maintenance task. It is recommended to conduct this inspection at least once a year. Look for any signs of damage, cracks, leaks, or weakness in the connections. If you notice any issues, address them promptly to prevent further damage.
However, take care not to over-tighten the connections, as this could lead to serious internal damage.
2. Mind Electrical Safety
It’s important to treat your tankless water heater’s electrical components with caution. If you ever need to perform any installation, repair, or disassembly, always ensure that you have shut off all power to the unit directly at the fuse or breaker box.
Not paying attention to this important safety rule could lead to really bad injuries or even death. So, it’s super important to always think about safety when you’re working with things that use electricity
3. Purge Air from Plumbing Lines
When you do things to take care of your water heater or the pipes in your home, sometimes air can sneak into the pipes. To make sure nothing bad happens to the heating part of the water heater and to keep your warranty valid, it’s really important to turn off the power to the water heater and get rid of the air from the pipes before you let the water heater start again.
This easy thing to do can help you avoid spending a lot of money on fixing problems and make your Eemax tankless water heater last a long time.
4. Address Hard Water Concerns
If your water supply has a high level of mineralization, commonly known as hard water, it’s important to pay special attention to maintenance. Hard water can lead to mineral buildup within the water heater and reduce its efficiency and potentially cause damage over time.
To mitigate these effects, you’ll have to increase the frequency of your maintenance checks. Regularly inspect the interior of the unit for mineral buildup and flush the system if necessary.
Periodic Maintenance Of Your Eemax Water Heater
Now let’s learn about some periodic maintenance guides. To make sure the water keeps flowing smoothly all the time, you might need to do a simple thing now and then. This will keep things working just right.
Well, this part is more important if you’re a user of LavAdvantage™, AccuMix II™, & FlowCo™ models then this part is specially for you.
1. Keep The Water Flowing
To keep enjoying hot water whenever you need it, it’s a good idea to do a little check now and then. Sometimes, things like bits of dirt or tiny particles can try to slow down the water. You can fix this by cleaning something called the “faucet aerator” or the “filter screen.” These are just like filters that help keep the water clean. The “faucet aerator” is the part at the end of your faucet where water comes out. And the “filter screen” is in a special spot at the heater where water comes in.
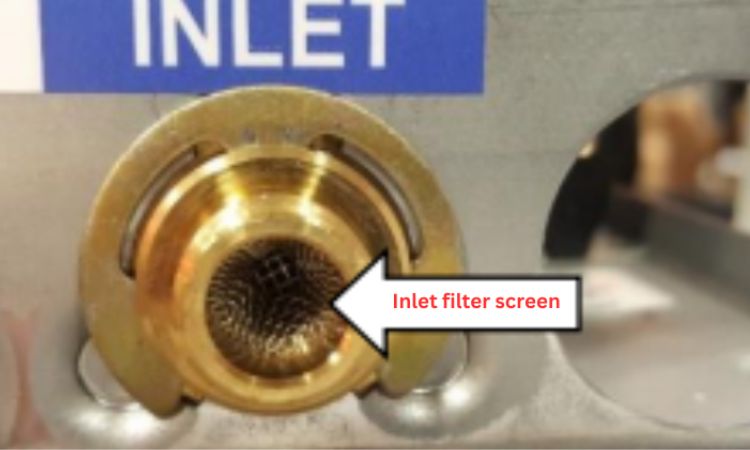
2. Simple Cleaning
Cleaning the faucet aerator and the filter screen is easy. All you need to do is remove them and give them a nice clean. You can use water to wash away the little bits that might be causing the slowdown. Then, just put them back in their places. It’s like giving your water heater a mini-spa day!
3. Enjoy the Benefits
Doing this little maintenance task helps make sure your water heater keeps doing its job well. When the water flows smoothly, you get to enjoy nice hot water without any interruptions. Plus, your water heater will be in shape for the care you’re giving it, and it will keep working its best for you.
Advanced Eemax Water Heater Maintenance Guidelines (Mini Tank/De-Ionizedr Models)
I’ve already discussed the general maintenance guide for the Eemax water heater. But here in this segment, I’ll discuss something more complex. After working with different Eemax models, my experience says this guide is more applicable for you if you’re a user of the Eeman Mini Tank or a De-Ionized heater user.
Before We Start
Most of the time when you’re doing maintenance, you’ll need to drain the water heater. No matter what maintenance task you’re doing, the first step is to turn off the POWER button and then disconnect the power. This keeps everything safe and prevents any accidents.
Before you ask for help with any issues, make sure the water heater is filled properly and the power with 110VAC isn’t interrupted.
Guide 1: Draining And Removing The Water Heater
Regular maintenance, like draining and removing the water heater, is crucial for keeping your water heating system running smoothly. Over time, sediment and buildup can accumulate in the tank, and it can affect its efficiency and performance. By following the below steps, you can ensure that your water heater stays in good condition.
Step 1: Disconnect Power
Before you start, make sure to turn off the power supply to the water heater. This is important for your safety while working on the unit.
Step 2: Let Hot Water Run Out
Now open a hot water faucet in your home to allow hot water to flow out. Let it run until the water is no longer hot. This will help to reduce the amount of hot water in the tank.
Step 3: Turn Off Cold Water Supply
Locate the cold water supply valve that feeds water into the heater. Turn it off to stop water from entering the tank.
Step 4: Close The Hot Water Faucet
After the water stops flowing from the faucet, close it.
Step 5: Disconnect Water Connections
Now, carefully disconnect both the hot and cold water connections from the water heater. This will let you separate the heater from the plumbing.
Step 6: Siphon Out Remaining Water
If possible, use a siphon to remove any remaining water from the tank. This will reduce the amount of water that spills when you detach the heater.
Step 7: Detach From The Wall
Gently detach the water heater from the wall. You may have to remove brackets or supports that hold it in place.
Step 8: Drain The Heater
With the water heater detached, carefully tilt it to the side to drain any remaining water from the tank. Make sure to direct the water into a suitable drainage area.
So, now you’re done. By regularly draining and removing your water heater, you’re preventing the buildup of sediment and ensuring that it continues to work efficiently.
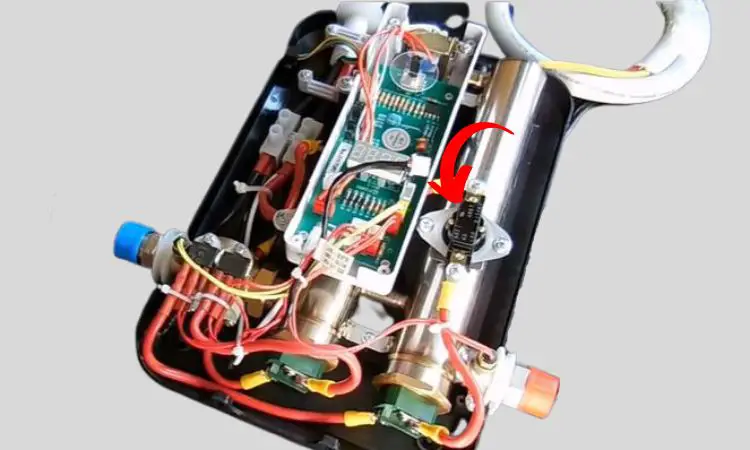
Guide 2: Remove Heating Element, Descale, And Replace Thermostat Matters
When it comes to keeping your water heater working well, it’s important to look after its parts like the heating element and thermostat. These are the important pieces that help your water heater do its job. But, as time goes by, things like scale buildup and wear can affect how well they work.
That’s why regularly removing, descaling, and replacing these parts ensures your water heater continues to function optimally and provides hot water when you need it.
Removing The Heating Element
First, let’s get into the process of removing the heater element.
- Power Off and Drain: Begin by turning off the power supply and disconnecting the water heater from power. Drain the water heater using the procedure we’ve mentioned above.
- Access and Remove Cover: Now. remove the cover of the water heater to access the heating element.
- Disconnect Line Wires: Carefully disconnect all line wires connected to the heating element.
- Unscrew Retaining Nuts: After that, unscrew the retaining nuts that secure the heating element in place.
- Element Removal: Finally, gently remove the heating element from its position.
Descaling The Heating Element
In the next step, you’ll learn how to descale the heating element. Let’s learn about the process.
- Remove the Heating Element: Follow the previous guide to learn how to do it.
- Chemical Descaling: To descale chemically, immerse the heating element in white vinegar or another descaling solution. Rinse it thoroughly with fresh water after soaking.
- Manual Descaling: Allow the element to dry, then use a non-metallic brush (similar to a toothbrush) to carefully remove scale residue. Avoid damaging the element’s surface.
- Reinstallation: Put back the heating element and its gasket.
- Refill and Power On: Refill the tank with water before turning the power back on to the water heater.
Eemax Water Heater Maintenance youtube
This is another part. Let’s see how to do it.
- Disconnect Power and Drain: Turn off the power and drain the water heater as instructed previously.
- Note Original Positions: Remove the existing heating element. However, take note of the positions of all connections.
- Install New Element: Install the new element with its gasket and ensure proper positioning.
- Secure and Reconnect: Lastly, tighten the retaining nuts securely and make wire connections to their original locations.
Changing The Thermostat
This is the final part. Now let’s see how to do it.
- Power Off and Disconnect: Turn off the power switch and disconnect the water heater from the power supply.
- Drain and Remove: Follow the steps mentioned earlier to drain and remove the water heater.
- Access and Remove Panels: Remove the bottom panel and the thermostat knob. Unscrew the two retaining screws that hold the thermostat in place. If needed, gently pry the knob off its spindle before removing the front panel.
- Wire Connections: Disconnect the push-pull wire connectors from the thermostat. Also, take note of which connector goes to which terminal (terminals are marked).
- Thermostat Probe: Remove the thermostat probe from its well.
- Install New Thermostat: Install the new thermostat, attach the wires, and tighten the screws securely.
By regularly tending to the heating element, descaling, and thermostat replacement, you ensure the continued efficiency and lifespan of your water heater. Carefully follow these steps, and remember to prioritize safety by disconnecting power and draining the heater before any maintenance tasks.
Guide 3: Restart The Heater
Sometimes, for different reasons, the high-limit safety shut-off switch in your water heater might decide to take a break and shut the water heater down. This happens when the water inside gets really hot, like more than 190 degrees Fahrenheit.
When this happens, the power to the heating part is turned off all by itself. This could be because of things like a power outage or even a big electrical storm.
Important Points To Remember
- Safety First: Before you try to reset the high-limit switch, it’s super important to let the water heater cool down. This helps avoid any accidents or problems.
- No Tricks: Don’t try to play around with the reset button to make the heater start again if it shuts off because of overheating. It’s there for safety, and it’s best not to mess with it.
Here’s What To Do:
- Switch off the power and unplug the water heater from the electricity.
- Next, you’ll have to drain and remove the heater. Follow the above Guide 1 for more details.
- After that, remove the bottom panel of the water heater.
- In this step, look for a small red button in a box that’s called a junction box.
- Finally, push the small red button that’s right in the middle of the junction box. Then, put the bottom panel back on and put the water heater back where it was.
Caution: If you notice that you have to reset the high-limit switch a lot, it’s best to call a technician or contact with help center. They can figure out what’s going on and help you out.
Well there are more ways to reset the Eemax water heater. If you want to learn more then follow the linked article.
FAQs:
What routine maintenance is recommended for tankless water heaters?
Make sure you don’t forget these three crucial tasks to keep your tankless water heater in good shape: Clean or change the water line filter. Also, don’t overlook cleaning the air filter. Lastly, remember to descale and flush the system.
How often should I flush my tankless?
It is recommended to flush your tankless once a year. However, it may vary from brand to brand. So it’s better to follow the user manual.
How often do you change the filter in a tankless water heater?
You should change the filter once every six months. However, you should follow the manufacturer’s guide for the accurate replacement time limit.
Conclusion
So, that’s everything about – Eemax water heater maintenance. In this guide, I’ve covered guides for both Eemax mini tank, electric, and Eemax tankless water heater maintenance guides.
In conclusion, we would say proper maintenance is essential to keep your Eemax tankless water heater operating smoothly and efficiently. By following these maintenance guidelines, you can prevent potential issues, ensure your safety, and maximize the lifespan of your water heater. However, to fix your heater problem you can read the Eemax tankless water heater troubleshooting guide.