Having worked on numerous heaters over the years, I can tell you that the main reasons behind rheem water heater not turning on or shutting off in a gas water heater are:
- Gas supply issues.
- Thermocouple or thermopile problems.
- Pilot light issues.
- Insufficient air supply.
- Defective gas control valve.
In Rheem electric water heaters, this issue is commonly caused by:
- Electrical issues with the wiring or the breaker.
- Tripped ECO.
- Defective thermostat.
- Faulty heating element.
I’ll talk about all these problems along with their solutions in detail in this guide. So, let’s dive in!
Table of Contents

Rheem Water Heater Not Turning On Or Shutting Off [Gas Water Heaters]
I’ll discuss the main reasons why your Rheem gas water heater keeps shutting off along with their fixes in this section.
01. Gas Supply Issues
Gas is the primary fuel source in gas water heaters. If there are any issues with the gas supply, the pilot and the main burner won’t stay lit. There are a lot of potential issues that could go wrong with the gas supply.
Firstly, using the wrong type of gas is also a potential reason why your heater keeps turning off again and again. You can’t use liquid propane on a natural gas water heater and vice versa.
Secondly, the manual gas shutoff valve may not be fully open. So, the gas supply may not be enough to keep the pilot lit. So, the pilot light would go off and your heater would keep shutting off.
You may have also forgotten to pay for your gas pills if you were on vacation. So, the gas supply to your house may have been cut off at the source. You can try lighting other gas-powered devices. If none of them work, you can be sure that the gas supply to your entire house has been cut off.

If your heater has turned off and you can’t turn it back on anymore, the gas supply could be finished. For LP users, the gas tank could be empty. For natural gas users, you may not have paid your utility bill in time and the gas supply could be cut off.
Moreover, there could be gas leaks that could turn off the water heater. This is a serious issue and it could trip the flammable vapor sensor. You should also be able to smell the gas if there’s a leak.
If there are obstructions in the gas lines, it will prevent the smooth flow of gas. So, it can lead to the heater turning off. The final thing to check for potential gas supply problems is the flex tube. If it’s kinked, it’ll interrupt the gas supply and cause this issue.
How To Fix:
You need to do a thorough job investigating the issue so that you can get to the root of the problem. First and foremost, you should be sure of what type of gas your heater needs. Make sure that the correct type of gas is being supplied.
Secondly, ensure that the manual gas shutoff valve is fully open. The valve will be completely parallel to the gas lines when it’s completely open. So, turn it all the way to the open position if it already wasn’t there.
If the other gas-powered devices in your house also don’t work, the gas supply has been cut off. Just pay your bills and call your local utility company to restore the gas supply to your house.
If you didn’t find any gas supply issues, then don’t worry. It’s possible that the gas supply is fine but there are other problems with your heater that makes it turn off. So, keep on reading to find out about them.
02. Thermocouple Problems
Depending on the type of gas control valve your heater has, the unit will either have a thermocouple or a thermopile. Both of them work similarly to each other. They both convert the heat from the pilot light to electrical energy.
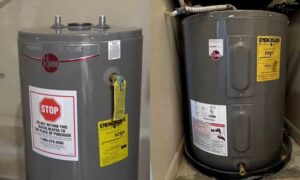
I’ll talk about the thermopile in the next section. Let’s focus on the thermocouple for now. If you have a heater with an old gas valve without a status light, your unit will likely have a thermocouple. Here’s an example of the gas control valves of heaters that have a thermocouple:

The thermocouple senses the heat from the pilot light. It’s essentially a safety device to prevent the build-up of gas in the main burner. The thermocouple is designed to go off when the pilot light is off. When it goes off, the gas control valve will stop supplying the gas.
But those are all a part of the normal operating condition of the heater. There’s a lot that can go wrong with the thermocouple. The most common issue with the thermocouple is that it gets dirty with time. Otherwise, it could also get bent or damaged.
How To Test A Rheem Water Heater Thermocouple?
You need to be sure whether the thermocouple is actually bad before jumping to a conclusion. The good news is that you can easily test the thermocouple if you have a multimeter and a few other basic tools.
You must know how to relight the pilot to do this test. If you don’t know how to do that, scroll down to the section on pilot light issues. With that said, here are the steps you can follow to test the thermocouple:
- Turn off the gas supply to the water heater by setting the gas control knob to the “Off” position. Remove the cover at the bottom located in front of the main burner so that you can look at the pilot flame through the viewport.
- Make sure the pilot and gas supply are off. Then, set up your multimeter by putting it in the “DC” mode.
- Remove the connection between the gas control valve and the thermocouple. You’ll need an adjustable wrench to remove the thermocouple from the gas control valve.
- Attach the red lead of the multimeter to the end of the thermocouple where it’s rounded. Then, attach the black lead to the copper part of the thermocouple.
- Relight the pilot and confirm whether it’s on by looking through the viewport. If it’s on, note down the readings that show up on the multimeter.

You’ve done the test. Now, it’s time for the results. You’ll see the reading on the multimeter rise as the thermocouple starts heating up. If the reading is between 20-30 millivolts, you have a good thermocouple. Otherwise, something is wrong with the thermocouple in your heater.
How To Fix:
If the thermocouple you tested is bad according to the test, there’s a high chance that you have a dirty thermocouple. It’s most likely not damaged but clogged up so much that it doesn’t sense the heat from the pilot flame.
How To Clean Rheem Water Heater Thermocouple?
It all comes down to cleaning the part of the thermocouple that’s close to the pilot assembly. That’s because it’s the part that actually senses the flame from the pilot. You can choose between sandpaper, an emery cloth, or a microfiber towel to clean the thermocouple.
The hard part is that you’ll have to remove the main burner and isolate the thermocouple to clean it. You’ll learn how to do that in my section on replacing the thermocouple. Follow the instructions there with the main difference being that you’ll clean the thermocouple instead of replacing it.
When you access the thermocouple, you may find that it’s bent. It’s a common issue and the main reason behind it is damage during shipping. You can realign it to the right position or replace it altogether.
How To Replace Rheem Water Heater Thermocouple?
If cleaning the thermocouple doesn’t do the trick, that’s a strong sign that it has gone bad. You’ll have to replace it in that case. Here are the detailed instructions to replace the thermocouple:
- Turn off the gas supply to the water heater. You can do it by shutting off the manual gas valve and setting the gas control valve to the “Off” position.
- Remove the different gas valve connections in your water heater. That includes the thermocouple, the pilot tube, the main gas supply, and the igniter wire. You’ll need adjustable wrenches of different sizes to remove those connections.
- Take off the outer cover of the main burner. Then, remove the screws holding the main burner in place. Once you remove them, gently glide the main burner out of the water heater. Be careful not to damage anything when you do it.
- Undo the screw that connects the pilot assembly to the rest of the main burner. Separate the plug that holds the wire and isolate the thermocouple. Then, remove the old thermocouple through the push fitting. You can unscrew the thermocouple if it’s a screw-fit type.
- Double-check that the new thermocouple is the same size as the old one. Then, put it in place of the old one and reverse engineer the above steps to put your heater back together.
That’s all about replacing the thermocouple on your own. If that feels like too much work and you don’t think you can do it on your own, consult a qualified technician. It’s a good idea to replace the thermocouple even if you have a dirty thermocouple. That’s because it’ll be dirty again soon and cause issues.
So, replacing the thermocouple altogether is a more long-term fix to the problems. It’s also not an expensive component. So, there’s no reason not to replace it now that you know how to do it. Hopefully, your Rheem water heater will no longer keep turning off once you replace the thermocouple.
03. Thermopile Issues
Just like the thermocouple, the thermopile is an important device in a gas water heater. You won’t find both of them in a single water heater. There’ll only be one of them.
You’ll find the thermocouple in the older gas control valves. But if your heater has a relatively newer gas valve that has a status light, it’ll definitely have a thermopile and not a thermocouple.
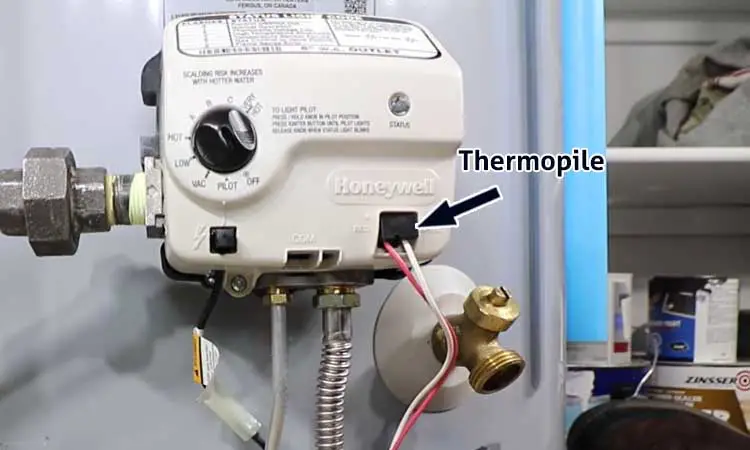
The thermopile also senses the pilot flame and signals the gas control valve to keep supplying gas. If the thermopile stops sending that signal at any point, the gas supply will be shut off. And the pilot won’t burn without gas. So, the water heater will be turned off.
There are two main reasons that could cause issues with the thermopile. Either the thermopile is dirty due to the build-up of soot or it’s defective. Apart from that, the connection between the gas control valve and the thermopile could be loose. That could also cause this issue.
How To Test Rheem Water Heater Thermopile?
Rather than relying on guesswork, it’s always better to be sure. If you’re sure about what’s causing the issue, then you can work towards fixing it immediately. And the good news is that you’d only need a multimer to test the thermopile. Follow these steps to do it:
- Turn off the gas supply to the water heater by shutting off the manual gas shutoff valve. Then, turn off the gas control valve and give the heater some time to cool down.
- Pull out the thermopile from its connection at the gas control valve. If you have to move it back and forth many times, then you know that a loose connection isn’t an issue here. While pulling the thermopile connector, be careful not to damage it.
- Attach the black probe of the multimeter to the white wire of the thermopile. Connect the other multimeter probe to the red thermopile wire.
- Now, you’ll have to relight the pilot. Turn on the gas control valve and set it to the “Pilot” position. Then, press the igniter button repeatedly until the pilot is lit. Check through the viewport if the pilot is lit.
- You’ll notice that the reading on your multimeter will continue to rise if the pilot lights up. It’ll stabilize at one point once the pilot flame reaches its full potential. It could take a few minutes to get there.

Once you have that maximum reading, you’ll know if you have a healthy thermopile or not. A good thermopile should give a reading of 650-850 millivolts. If the reading of the thermopile in your heater is outside that range, you can conclude that you have a bad thermopile.
How To Fix:
First, solve the easy issue and tighten the connection between the gas control valve and the thermopile if they had been loose. Double-check if the wiring was damaged. If any of the wiring was damaged, it’ll have to be replaced.
But more often than not, the thermopile itself would be faulty. The only solution in such cases is to replace it with a new one.
How To Replace Rheem Gas Water Heater Thermopile?
Replacing the thermopile is similar to replacing the thermocouple. You’d also have to remove the main burner to access and replace the thermopile. Here are the detailed instructions on replacing the thermopile:
- Make sure the heater has no gas supply and both the main burner and the pilot are off.
- Remove the connection between the thermopile and the igniter at the gas control valve. Then, remove the pilot tube, and the main gas supply line from the gas control thermostat.
- Remove the outer door of the main burner. Then, remove the screws holding the main burner door. Pull out the main burner without causing any damage to it.
- Pull the retainer clip that connects several components in the main burner assembly. Remove the screw that holds the pilot assembly. Feed the pilot assembly through the burner door to remove and isolate it.
- Slide out the old thermopile and put the new one in its place. Then, follow the above steps in reverse order to put your heater back together.
Pro Tip: You’d have to use the appropriately sized wrenches when removing and tightening the gas valve connections. Otherwise, the connectors could become easily stripped.
Once you do that, you can try lighting the pilot again. If the pilot light stays lit after replacing the thermopile, you’ve solved the problem. If the issue still persists, you’d have to keep on diagnosing.
04. Pilot Light Issues
The pilot light must turn on and ignite the main burner to make the heater produce hot water. So, any issues with the pilot light mean that you won’t get enough hot water. You may fail to light the pilot at times. In that case, the heater won’t come on.

Apart from that, the pilot light can also go out and keep going out. The heater will keep turning off in that case. Both of them are annoying issues in gas water heaters. So, it’s important to figure out what causes these issues.
You can easily tell if you’re facing any pilot light issues. You can simply inspect the pilot light by looking at it through the viewport. You should see a steady blue flame if there are no issues with your pilot light.
A good flame height for a pilot light is roughly 3/8 to ½ inch. But if you see a yellow or weaker flame, that’s a sign that there could be issues with the pilot light. If the pilot light won’t come on at all, that’s also a troublesome problem.
The first major reason behind the pilot not lighting up is a clogged or pinched pilot tube. The gas flows from the gas control valve to light the pilot via the pilot tube. But the tube can get clogged with dirt and debris over time. A dirty tube won’t supply gas properly. So, the pilot will either not light up or go out.
Secondly, the other problems I’ve talked about so far can also lead to pilot light issues. Things like gas supply issues, a faulty thermocouple, or a bad thermopile can keep the pilot from lighting or making it turn off.
Moreover, not following the lighting instructions properly for your water heater will also cause pilot light issues. If enough air doesn’t enter your water heater’s combustion chamber, the pilot light won’t light up either. I’ve talked about the air supply issue in detail in the next section.
How To Fix:
More often than not, the main issue here will be a clogged pilot tube. The good news is that you can easily clean it. You can loosen its connection to the gas control valve and use different tools to remove the soot or dirt from it.
You can insert a needle into the tube to remove the dirt from the pilot tube. Alternatively, you can use a wired brush or a stiff-bristled brush to clean it. Whatever tool you use, the important thing is to get all the dirt out of the tube.
Once you get the dirt out, you can clean the exterior of the pilot tube using a soft cloth. Hopefully, that will solve your problem. If that doesn’t work, the other problems that I discussed could be causing the issue.
Luckily, I have a dedicated guide on that topic for you. Check out my Rheem pilot light troubleshooting guide to learn how to keep the pilot from going out. You’ll also find instructions on how to properly light the pilot in that guide. Hopefully, you’ll solve the pilot light issues after going through it.
05. Lack Of Air Supply
Along with sufficient gas, the heater also needs enough oxygen to operate properly. Without an adequate air supply, the heater may not turn on or keep turning off.
The most frequent reason behind insufficient air supply is when the air inlet openings are blocked. They could be blocked if you’ve installed the heater in a confined space and there’s not good airflow.
But more often than not, the air inlet openings will be blocked due to the build-up of dust and debris. You can easily identify if this is the issue by doing a quick visual inspection.

Just locate the air inlet openings and look at them. If you can see visible dirt, you can conclude that it’s clogged. Otherwise, you need to turn your attention to the air inlet screen.
Another important component for maintaining proper air supply for the main burner is the air inlet screen. You’d have to pull out the main burner to access it. Usually, it’ll be full of dirt when it’s blocking the air supply.
The final thing to check that could potentially cause air supply issues is the grill under the heater. The heater also sucks in air through that grill. If that’s clogged, the heater won’t work properly and could keep turning off.
How To Fix:
The right fix depends on what’s causing the air supply issue here. If the air inlet openings are clogged, you need to clean them. Ideally, you should use a vacuum cleaner to get the dirt out. If you don’t have that, you can use a brush or a piece of cloth to get as much debris out as you can.
The next common culprit is the air inlet screen. You’d have to remove the main burner to clean it. You already know how to do that from the section on replacing the thermocouple. Once you get the main burner out, clean the air inlet screen using a vacuum cleaner.
Finally, you’d have to clean the grill under the heater. You can use a brush that’s easily extendable. As you won’t be able to lift the heater, you’d have to clean it with that brush. After you clear out the dirt from these air supply sources, there should no longer be any problem with the air supply.
You can keep this problem at bay by maintaining your water heater properly. You should clean the exterior of the heater at least once a year. Similarly, you can pull out the main burner, clean it, and the air inlet screen at the same interval. If you do that, you won’t face this issue anytime soon.
06. Faulty Gas Control Valve
One of the most important components of a gas water heater is the gas control valve. It controls the gas supply to the pilot and the main burner. Besides, the thermostat of the heater is also embedded in the gas control valve. So, when the gas control valves, it can cause many issues with the water heater.

One such issue is that it can keep the heater from turning on. If it doesn’t supply gas to the pilot, the heater won’t come on. Similarly, it can also make the heater go off. It can cut off the gas supply at any point and extinguish the pilot flame and the main burner.
It can create other issues like popping up error codes even when nothing is wrong with the heater. The bottom line is that it’d be a total nightmare to operate your water heater when you have a bad gas control valve.
But how do you know if you have a bad gas control valve? The first major sign is the pilot not lighting up or it keeps going out. Besides that, fluctuations in the water temperature, gas leaks, and water leaks are also some common symptoms of a failing gas control valve.
If you notice some of these symptoms simultaneously, there’s a high chance that you have a bad gas control valve. But it’s better to be sure and you’d have to test the thermostat to do that.
How To Test Rheem Gas Control Thermostat?
The first step when it comes to testing the gas control valve is to make sure the thermopile is okay. Oftentimes, the thermopile will be bad and cause the pilot light issue. You already know how to test the thermopile. Replace the thermopile if it’s bad.
If the thermopile is okay, then you can move on to test the gas control valve. Follow these steps to do it:
- Undo the screw at the bottom of the gas control valve. Locate the two tabs on the top of the gas control thermostat and pull them with a flat-blade screwdriver.
- Remove the front cover of the gas control valve and keep it as straight as possible when doing so. Make sure you don’t cause any damage to any of the components when removing them.
- You’d see three pins once you have eyes on the internal structure of the gas control valve. That includes the common coil, the main coil, and the pilot coil. Here’s what they look like:

- Check the resistance between the common and the pilot coils at first. The black probe of the multimeter will always sit at the common coil.
- Similarly, measure the resistance between the common and the main coils. Note down the readings you get.
If you have a good gas control thermostat, both of these resistance readings will be around 11 to 13 Ohms. But if the reading is outside that range, it means you have a bad gas control valve.
How To Fix:
You’d have to replace the gas control thermostat if it’s faulty. You can do it yourself or hire an expert to do it. The choice is yours. But I’ll show you how to replace it on your own if you feel like taking on the job yourself and saving the labor charges.
How To Replace Rheem Gas Control Thermostat?
Once you get the right replacement gas control thermostat, you can follow these steps to replace it:
- Turn off the gas supply and the water supply to your water heater.
- Drain the tank and get rid of all the water inside it.
- Remove all the gas valve connections including the pilot tube, the main burner gas supply, the thermopile, and so on.
- Use a pipe wrench and rotate the gas control valve counterclockwise. It shall come loose at one point. Then, you can rotate it by hand and remove it.
- Insert the new gas control valve in place of the old one and tighten it with the pipe wrench. Then, reverse engineer the above steps to complete installing the gas control valve.
That’s how you can replace the gas control valve on your own. If anything is unclear or the steps aren’t detailed enough, don’t worry. I have a dedicated topic on topic for you.
Visit my Rheem water heater gas control valve troubleshooting guide to learn how you can remove it in detail. You’ll also learn how you can reset the gas control valve in that guide.
07. Tripped Thermal Release Device
I’ve already talked about the key reasons why your heater won’t turn on or keeps turning off. But if none of them seem to be the issue, then you need to look into the thermal release device next.

The thermal release device is a safety device installed at the bottom of your heater. You’d have to pull out the main burner to look at it. It’s easy to tell if the TRD gets tripped.
There’s a pin inside the TRD that pops when the device gets tripped. The glass bulb inside the TRD will break off. That’s how you’d be able to tell that the TRD has tripped.
When the TRD gets tripped, the bottom of the heater will no longer be able to breathe. So, it’s obvious that you won’t be able to turn on your heater. Even if it turns on, it’ll go out soon and you won’t get any hot water.
How To Fix:
If you have a tripped thermal release device, it needs to be replaced. Now, most people delegate this job to an expert since it’s not easy to work with this part. It’s understandable if you want to do the same. But I’ve still shared how you can replace it yourself if you’re interested.
How To Replace Rheem Water Heater TRD?
You’ll need a Torx 20 screwdriver and the right TRD replacement kit to replace the TRD on your own. It’s not difficult to replace it if you can easily access the bottom section of your heater. With that said, you can follow these steps to replace the TRD:
- Turn off the gas supply to the water heater by shutting off the gas control valve or the manual gas shutoff valve. Remove the main burner outer door and disconnect all the connection points at the gas control valve.
- Use the Torx 20 screwdriver to undo the four screws holding the main burner door in place. Once you remove them, gently pull out the main burner without causing any damage to it.
- Locate the thermal release device inside the water heater. It’ll sit in the middle of the combustion chamber towards the rear end. Press down the TRD housing, turn it counterclockwise 90 degrees, lift it, and remove it.
- Locate the spring clip. It’ll be located inside the combustion chamber or under the floor shield. Once you find it, remove it.
- Place the new TRD assembly on top of the damper rod. Press down on it until the rod seats. Then, rotate the TRD installation tool 90 degrees clockwise to secure the TRD in its place.
- Double-check that the TRD is secure. It should not move and the plate rod shouldn’t be visible after you install it. Reinstall the main burner to the water heater and turn the gas supply back on. Then, relight the pilot and use the water heater.
That’s how easy it is to replace the thermal release device on your own. Another thing you should keep in mind is that the TRD is a safety device. There must have been a reason that made the TRD trip.
You need to solve the underlying issue that made it trip if you want to solve the problem for good. The most common reasons that made the TRD trip are:
- Gas pressure is out of range.
- Flammable vapors have been detected.
- Venting issues.
If the TRD doesn’t trip again, you don’t have to worry about these issues too much. But if it gets tripped again, then you need to inspect those problems as well and solve them. Hopefully, you won’t have to do that, and replacing the TRD will be enough to solve your problem.
Rheem Water Heater Not Turning On Or Keeps Shutting Off [Electric Water Heaters]
You may also face this issue with your Rheem electric water heater. As gas and electric water heaters operate differently, the reasons behind this issue are also different. Here are the main reasons why your Rheem electric water heater won’t turn on or keeps turning off.
i) Electrical Problems
The most common culprit why your heater won’t turn on is electrical issues. There’s a lot that can go wrong with the heater in terms of the electrical connections. The wiring of the heater can become loose, corroded, or damaged.
On top of that, the circuit breaker that supplies power to the heater could get tripped and cause this issue. A power outage will also turn off the water heater without any prior warning.

How To Fix:
First of all, you should check the breaker that powers the heater. If it was tripped, you can switch it back to restore power to the heater. Hopefully, that’ll do the trick.
But sometimes, the circuit breaker can keep on tripping again and again. That’s a more serious issue and there are many potential culprits behind it. Check out my Rheem heater circuit breakers get tripped guide to learn more about these issues and their fixes.
Secondly, check the wiring of the heater that you can and make sure everything is good. It can be hard to pinpoint if anything is wrong with the wiring. But check what you can and you can consult an electrician if you don’t find the issue after going through this guide.
In case of a power outage, you’ll simply have to wait for the power to come back on. You can call your electricity provider to get an update on when you can expect the power. But that’s about all you can do about it. Simply wait and turn the heater back on to enjoy hot water when the power comes back.
ii) ECO Gets Tripped
There’s a safety device in almost all electrical water heaters called the ECO. The Electrical Cut Off device shuts off the power to the heater when the water temperature gets too high.
The idea behind the ECO is to protect the users from scalding. When the water temperature is too high, it can cause severe burns. So, the ECO turns off the power to the heater to prevent that. When the ECO gets tripped, you won’t be able to turn on your heater.
How To Fix:
If you have a tripped ECO, you’d have to reset the heater first. Once you do that, you’ll be able to restore power to the heater and get hot water from it.
How To Reset Rheem Electric Water Heater?
You’ll have to follow a few simple steps to reset your Rheem water heater. Here’s how you can do it:
- Turn off the power to the heater by flipping the circuit breaker.
- Remove the screws holding the upper element access cover in place and take off the cover. Set the screws aside and keep them in a safe place so that you don’t lose them.
- Remove the insulation and you should see the red reset button on your heater.

- Press the reset button and you should hear a clicking sound. That sound indicates that the heater has been reset.
- Put the insulation and the access cover back on. Then, turn on the circuit breaker and restore the power to the heater.
That’s how easy it is to reset the heater. If you don’t hear a clicking sound when you press the reset button, the heater isn’t reset. It means that the ECO wasn’t tripped and something else is causing the issue.
Remember that sometimes the ECO can keep getting tripped. It always trips for a reason. And if it gets tripped multiple times, that’s never a good sign. The main reasons why the ECO keeps getting tripped are:
- Damaged or broken thermostat.
- Defective heating element.
- Faulty reset button.
You’re a little unfortunate if the ECO keeps on getting tripped in your heater. But I got your back. Visit my Rheem reset button guide to learn more about these issues and how you can solve them.
iii) Defective Thermostat
You already know that the heater will shut off when the ECO gets tripped. One of the reasons why the ECO gets tripped is a faulty thermostat. When the thermostat operates normally, it tells the heating element to shut off when the desired temperature is reached.

But a malfunctioning thermostat will not do that. So, the heating element will keep on heating the water even after the desired temperature is achieved. The end result is that the water will be exceedingly hot and the ECO will be tripped.
You may solve this issue temporarily by resetting the heater as shown earlier. But if the ECO keeps getting tripped, you need to look at the thermostat as a potential culprit. If you have a bad thermostat, the heater will keep turning off and you won’t be able to turn it on.
How To Fix:
Before you conclude that you have a bad thermostat, you should test it to be sure. As it’s not easy or inexpensive to replace the thermostat, you shouldn’t jump to a conclusion before you make sure it’s bad.
You’d need a multimeter to test the thermostat. Visit my guide on the Rheem electric heater not producing enough hot water to learn more about it. Once you scroll down to the section on thermostat issues, you’ll find detailed instructions on how you can test the thermostat.
If the thermostat turns out to be faulty, your only option is to replace it. But don’t worry, I covered how you can do that in that guide too. Hopefully, replacing the thermostat will solve your problem and your water will stay on.
iv) Faulty Heating Element
Last but not least, another common culprit that can make your heater turn off is a failed heating element. The main thing that goes wrong with the heating element, in this case, is that it gets shorted.

Under normal operation, the heating element stops heating the water once the desired temperature is reached. But a shorted heating element keeps on heating the water even when that happens.
So, the water temperature gets too high and the ECO gets tripped. Even after you reset the heater, the same thing will keep on happening and your heater will keep shutting off.
How To Test Rheem Heating Element?
You shouldn’t replace the heating element on a whim. You need to test it and be sure that you actually have a bad heating element. As always, a multimeter will come in handy to test it. Follow these steps to test the heating element in your Rheem water heater:
- Shut off the power to the water heater and wait for it to cool down. Remove the screws on both the access panel covers and take them out.
- Take off the insulation as well as the plastic covers that are in front of the heating element.
- You’d have access to the screws of the heating element at this stage. They’d be located right under the thermostat.
- Set the multimeter to the lowest Ohm settings you can on your device.
- Connect the multimeter leads to the two screws of the heating element. You can connect them in any order. Note down the readings.

A healthy heating element will read between 10 to 16 Ohms. But if the reading is outside that range, you have a bad heating element. Test both heating elements using this method. If any of them are outside this range, you can know for sure that you have a bad heating element and which one is faulty.
How To Fix:
If the diagnosis reveals that you have a failed heating element, you need to replace it. You can do it yourself or hire a mechanic for the job.
How To Replace Rheem Heating Element?
You can save the labor charges by replacing the heating element on your own. Once you have the right replacement part, follow these steps to replace the heating element in your Rheem electric water heater:
- Flip the circuit breaker to shut off the power supply to the water heater. Double-check that the power to the heater is off. Turn off the cold water supply and open a hot water faucet to relieve the pressure inside the tank.
- Drain the tank to a level that’s below the heating element you want to replace. You can only drain 5-10 gallons of water if you’re replacing the upper heating element. But you can drain the entire tank if you’re going to replace the lower heating element.
- Remove the access panel cover of the heating element you want to remove. Then, remove the insulation and the plastic cover to access the heating element. Loosen the screws of the heating element to disconnect the wiring attached to the heating element.
- Loosen the heating element using an element wrench and pull it out. Then, put the new heating element in place of the old one and tighten it with the wrench.
- Turn on the cold water supply and check for leaks. If there are leaks, tighten the heating element more. If there are no leaks, you can put everything back together.
Make sure the entire tank gets filled with water before you turn on the heater again. If you turn the heater on before that, the heating element could get shorted and you’d have to replace the it again.
Once the tank is filled with water and you turn on the heater, it could take a couple of hours for the water to reach the desired temperature. Once that happens, you can use your water heater as usual and enjoy the hot water.
FAQs:
Can high humidity make the thermocouple fail?
It doesn’t happen often but the humidity during summer months can make the thermocouple fail. The water tank can sweat, and water droplets can fall on the thermocouple and make it malfunction.
How often would you have to replace the thermocouple?
If you take good care of your heater and maintain it well, a thermocouple can last for up to a decade. So, you’d have to replace it only once or twice during the entire lifespan of your water heater.
What makes the flammable vapor sensor trip?
Firstly, the presence of flammable vapors will make the FVS trip. Even paint fumes and chemicals in detergents can make the sensor trip. Secondly, the FVS could be faulty.
How often should you clean the pilot tube in a Rheem water heater?
You should clean the pilot tube at regular intervals to keep it from being clogged. Cleaning it every six months or every year is generally good enough depending on your hot water usage.
Conclusion
Why is my Rheem water heater not turning on or keeps shutting off? Now, you know exactly why it happens for both gas and electric water heaters. Hopefully, it’ll be a simple issue and you’ll be able to fix it easily.
But you should also know how to tackle the more challenging issues that make your heater turn off. And that’s what I’ve tried to teach you in this guide. Check out my guide on maintaining Rheem water heaters if you want to prevent these issues in the first place.