
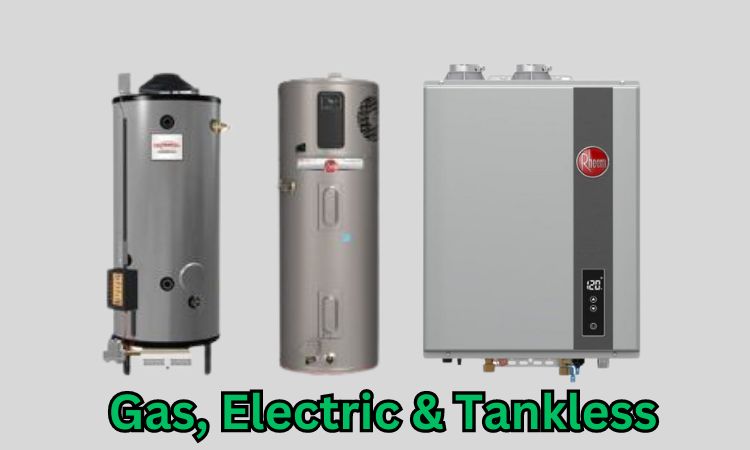
I’ve noted the most common issues you’d face with your Rheem gas, electric, and tankless water heater from my experience. The main problems I’ll discuss in this ultimate Rheem water heater troubleshooting guide are:
- No hot water
- Not enough hot water
- Condensation
- The pilot won’t light
- The main burner won’t light
- And more
I’ll not only explain the problems but also discuss how you can solve each of these issues in detail. So, let’s dive right in.
Table of Contents
Rheem Water Heater Troubleshooting [Gas Units – Ultimate Guide]
No matter which type of Rheem gas water you use, the problems will be similar. It doesn’t matter much if you have a power vent heater, performance platinum heater, or classic heater. The issues I’ll discuss are universal and applicable to all of them.

There would be some variations if you own a Rheem Professional Prestige Maximus Gas unit. That’s why I have a dedicated section on it that you can check later on. For now, let’s look at the common problems that you’d face with your Rheem gas heater.
01. No Hot Water
Your heater has one job – to provide hot water in your time of need. And when it fails to do just that, it’s obvious that you’ll be frustrated. It’s a common issue that you could also face with your gas water heater.

The main reasons behind not getting any hot water from your Rheem gas water heater are:
- There is no gas supply.
- The power switch is turned off.
- The combustion shut-off device was tripped.
- The gas control shut-off device was tripped.
- Faulty thermostatic mixing valve
How To Fix:
First things first, you have to make sure that the heater is on. Even if you didn’t do it, somebody else in your home could have done it. So, press the “On/Off” button again to turn on the heater if it is switched off.
Next, you have to check for gas supply issues. If the manual gas shut-off valve isn’t open all the way, it could lead to gas supply issues. So, check that and make sure it’s turned all the way to the On position.
The valve should be completely parallel to the gas lines. If you use the wrong type of gas for your heater, that could also cause gas supply issues. Make sure you’re using natural gas if your heater needs natural gas. You can’t convert your heater from running on natural gas to LP gas.
If you didn’t pay your utility bills recently, the gas supply may have been cut off. Try to operate another gas-powered appliance and check if it works. If it does, that means there is no issue with the gas supply.
The combustion shut-off and gas control shut-off devices are both safety mechanisms to prevent accidents. They shut off the gas supply to the water heater whenever there are unwanted risks. As this is a serious matter, you should consult a qualified technician to help you with this one.
Finally, you need to check whether you have a bad thermostatic mixing valve. Test the temperature of water at all the hot water faucets. If the no hot water issue only occurs at one faucet, the mixing valve in that valve has gone bad and is stuck closed. You’ll have to replace it to get hot water.
So, there are many reasons why a gas water heater may not turn on or not heat the hot water. Luckily, I also have a dedicated guide on this topic if you haven’t found the solution yet. Visit my guide on Rheem water heater isn’t heating to find more causes and solutions to this problem.
02. Not Enough Hot Water
There’s another issue that’s almost as annoying as getting no hot water. That issue is getting inadequate hot water. It means the water you get at the hot water faucet is lukewarm but it’s nowhere near the temperature you desired.
The primary reasons behind getting inadequate hot water from your heater are:
- Setting the thermostat too low.
- Too much hot water usage.
- Low gas pressure.
- Open or leaking hot water faucets.
- Colder water supply.
- Melted or damaged dip tube.
How To Fix:
As obvious as it may seem to set the right temperature, many people still make this mistake and set their thermostats at a low temperature. So, check your thermostat and turn it up if you’ve made that common mistake as well.
The issue with gas water heater thermostats is that they don’t state the temperature. Instead, they have positions where you can adjust the gas control knob. So, here’s a quick guide about the gas control knob positions and their corresponding temperatures:
- Low – 90° F
- Low To Hot – Between 90° F and 120°F (7-8°F increments at each point)
- Hot – 120°F
- A– 130°F, B – 140°F, C – 150°F
- Very Hot – 160°F

Hopefully, you’ll have no issues setting the right temperature from here on. Take a screenshot of this temperature setting guide so you can always return to it in case you forget the settings.
Next, you have to make sure that your hot water usage isn’t beyond the capacity of your heater. You should already know the capacity of your heater – it could be 40 gallons, 50 gallons, or more.
If the demand for hot water exceeds that, your heater won’t be able to keep up with that and you’ll get lukewarm water. You can check if this is the issue by seeing if multiple hot water faucets are being used at the same time.
If you have a large family and there’s an overlap when it comes to hot water usage, it could explain why you’re facing this issue.
Your first option is to plan a bathroom schedule so that there’s not a huge demand for hot water at any given moment. Otherwise, you can upgrade to a bigger heater to fix this issue.
The maximum inlet gas pressure for Rheem gas heaters in cases of both natural gas and LP is 14” WC. However, the minimum gas pressure varies depending on your heater. Check the rating plate of your water heater to know the exact value of the pressure for your heater.
You have to check the inlet pressure and compare it with the value given in the rating plate. If they’re matching, then there are no issues with the gas pressure. But if you don’t have the correct gas pressure, it’ll have to be adjusted to get hot water properly again.

Then, you should check for leaks. Even a minor leak on the hot water side can reduce the temperature of the hot water by a large degree. If you can identify any leak, you’ll have to seal it and replace the worn-out components.
The cold water itself can be colder due to the freezing weather conditions. In that case, it’s normal to get cooler water from the heater. You can turn up the temperature even higher to get hot water again.
Finally, you have to consider the possibility that the dip tube has melted. Cold water goes to the bottom of the tank as it’s directed by the dip tube. That water gets heated directly by the main burner. In the meantime, the water goes from the top of the tank to hot water faucets if there’s demand for it.
When the dip tube is damaged, the cold water gets mixed with the hot water. So, the overall water temperature gets reduced and you get less hot water. If that’s the case with your heater, you’d have to replace the dip tube. Don’t worry, I’ll show you exactly how you can do it.
How To Replace Rheem Water Heater Dip Tube?
Dip tubes come in different shapes and sizes. It’s important that you get the right replacement part if the dip tube in your water heater is damaged. Visit this Rheem dip tube sizing guide to find the right part for your heater.

You’ll need a few additional tools to replace the dip tube. A flathead screwdriver, an adjustable wrench, a pipe wrench, and a garden hose will come in handy in this replacement job. Once you get your hands on them, you can follow these steps to replace the dip tube:
- Turn off the gas supply to the water heater and unplug it from its power source. Then, turn off the cold water supply to the water heater as well.
- Attach the garden hose to one end of the drain valve and place the other end near a floor drain. Open the drain plug to start getting rid of water inside the tank. You only need to drain around 9-10 gallons of water when replacing the dip tube.
- Disconnect the cold water supply line to your water heater. The tools you’ll need to do that depend on your water heater. You can remove the cold water supply line with an adjustable wrench if there is a flex connector. But if your heater has copper tubing, your only option is to cut it.
- Take off the plastic shroud to access the dip tube from the top of your water heater. Then, rotate the dip tube using the adjustable pliers or a pipe wrench. When the dip tube becomes loose, you can pull it out.
- Cut the new dip tube to match the length of the old one. Apply some Teflon tape to the water heater and then, put it in. Tighten the dip tube, reattach the plastic shroud, and reconnect the cold water supply line.
That’s all it takes to replace the dip tube. It can seem complicated if you don’t know what you’re doing. If you need more detailed instructions, check out my post on replacing dip tubes in Rheem water heaters for more information.
It does take some expertise and previous experience working on heaters to replace the dip tube. So, it wouldn’t be a good starting project if you’ve never made repairs on your water heater before. If that’s the case with you, I recommend going for a qualified technician to do this job.
03. Condensation
When you install a new heater and you see condensation forming on the tank, it’s normal to be worried. But don’t worry, condensation is a normal part of the operation in new heaters.
It’s also normal for the burner to make a sizzling sound as droplets of water fall on it. But the condensation should disappear after a while. You only need to be alarmed when you’ve used your heater for a decent period and the condensation won’t go away or reappear.
The moisture from the products of combustion creates condensation. But it’s not good for the main burner in the long run. When there’s too much condensation, the main outage can be damaged. The most likely culprit here is fitting the pipes loosely.
Finally, using an undersized heater compared to your needs can also create condensation. The burner can get damaged after a while if you don’t do something to fix this issue soon.
How To Fix:
If the condensation issue remains even after you have waited for a while on a new installation, the pipe fitting could be loose. There must be a small leak that has allowed the condensation to happen.
You have to rectify this poor installation job. Talk to the people who installed the heater and have them check it out. Once the pipe fitting is tight, the condensation should go away.
Finally, make sure you have the right water for your needs. You can upgrade to a bigger heater or limit the hot water usage at a time. Pick the option that’s more feasible for you. But you can’t leave this issue hanging as you don’t want to cause damage to the main burner of your heater.
04. Yellow Flame
You should have a nice blue flame when the heater operates normally. But when you see a yellow flame instead, it’s normal to be alarmed.
The main reason behind getting yellow flame is scale build-up on the main burner. The debris on the burner interferes with the combustion process. The end result is a yellow flame.
Apart from the burner being clogged, restrictions on the flue or air inlet openings can also cause this issue. Finally, the lack of sufficient combustion or ventilation air can also cause a yellow flame.
How To Fix:
First, you have to check the burner and inspect if it’s dirty. You’ll have to pull it out to check it. The process is easy. You can follow these steps to do it:
- Shut off the gas supply to the heater and wait for it to cool down.
- Remove the connections of the water heater at the gas valve. It includes the thermocouple, the gas supply to the main burner, and so on.
- Once you’ve removed the connections, unscrew the four screws holding the burner access door in place.
- Remove the access door.
- Pull out the main burner assembly gently to make sure you don’t damage anything.

If you don’t feel comfortable doing it yourself, you can always delegate it to a qualified technician. Once you’ve pulled out the burner, inspect its condition. You’ll have to clean it if it’s dirty.
You can use a vacuum cleaner to get the visible dirt out of the burner. Then, you can scrub it with a mild detergent until you get most of the dirt out of it. If the burner is too dirty and it’s beyond cleaning, you can also replace it.
Clean the area where the burner would go using a vacuum cleaner as well. It’ll be a while before you clean it again. So, be patient and try to get most of the dirt out of the combustion chamber.
After you’re done cleaning the main burner, put it back gently. It’s a good idea to replace the gasket at the burner access door to create a good seal in the combustion chamber.
Even if the main burner wasn’t the main issue here, there’s no waste of work here. You should inspect and clean the main burner once or twice a year to increase the longevity of your water heater.
Hopefully, you’ll have a nice and steady blue flame after cleaning the burner. Air in the gas lines can also cause this issue with the burner. Consult a qualified technician to purge the air from the gas lines if needed.
If you still get a yellow flame, it’s time to turn your attention to the restrictions in air inlet openings. You may have placed an object close to it and that blocks the openings.
There should be at least 1 inch of clearance between the air inlet openings and another object. So, if you’ve placed anything next to it, locate the object in another area.
Finally, you have to make sure that there is room for sufficient combustible air to enter the heater. Don’t install the area in a confined space. Three must be more than 50 cubic feet per 1000 Btuh of clearance for the heater. Once you take care of things, you should have a steady blue flame.
05. The Pilot Won’t Light
Lighting the pilot is the first step to using your water heater. Once the pilot is lit, it can ignite the main burner and you’ll start getting hot water. But if there is no pilot light, you won’t get any new hot water.

The primary reasons why the pilot won’t light are:
- Not correctly lighting the pilot.
- Clogged pilot burner orifice.
- Pinched or clogged pilot burner tube.
- Air in the gas lines.
How To Fix:
It’s most common for the pilot to not come on when the user fails to follow the pilot lighting instructions properly. As you’re reading this guide, that won’t be you. Before I show you how to light the pilot correctly, here are some additional tips to help you out:
- Never try to light the pilot by hand as the gas heater has a piezo-electric ignition system.
- Smell for gas before lighting the pilot. If you smell gas, refrain from lighting the pilot and call an expert immediately to handle the situation.
- Never use tools to turn the gas control knob. Always use your hands to turn the knob as tools can cause damage to it.
- Don’t try to light the pilot on a heater that has been flooded.
How To Light The Pilot In A Rheem Gas Water Heater?
With those tips out of the way, you can follow these steps to light the pilot on your Rheem gas water heater:
- Turn the gas control knob to the “Off” position and wait for a few minutes to clear out any gas from the system. Take off the outer door of the heater so that you can look at the pilot and you can be aware of what’s going on.
- Locate the igniter button that’s placed right below the gas control knob. Turn the gas control knob to the pilot position. Then, press and hold the knob all the way in. As you hold down the gas control knob, press the igniter button several times until the status light starts blinking.
- If the status light starts to blink, verify that the pilot is actually lit by looking at the viewport. If the status light doesn’t blink, that means the pilot isn’t lit. In that case, you can repeat the above steps again to light the pilot.
- If the status light doesn’t come on even after multiple attempts, there could be other issues with your pilot light. You can call a technician or keep on reading as we’ll solve some common pilot light issues.
- Once the pilot is lit, you can let go of the gas control knob. It should pop right out and then, you can turn it to set your desired temperature. If the knob doesn’t pop out, you have to consult a technician.

Hopefully, that clears up how you can light the pilot and when you should seek professional help. If the pilot orifice or the pilot tube is clogged, it’ll have to be cleaned. At times, cleaning won’t do the trick and you’d have to replace the pilot assembly.
You can consult a qualified technician to replace the pilot assembly if you don’t know how to do it yourself. If there’s air in the gas lines, the technician can help you out with that too, and purge the air from them.
06. The Pilot Won’t Stay Lit
Another issue you could be facing with your heater’s pilot light is that it won’t stay lit. Once you let go of the control knob, the pilot is supposed to stay lit. But if the pilot light goes off after you let go of the gas control knob, that’s a problem that’ll lead to no hot water.
The main reasons why the pilot won’t stay lit are:
- The thermopile is defective or disconnected.
- Faulty safety magnet device.
- The gas control thermostat shut-off device was tripped.
- The combustion shut-off device was tripped.
How To Fix:
First, check if the thermopile wiring was disconnected. The wiring should be firmly connected to the connectors. If the wiring was disconnected, you can simply attach it again to solve the issue.

If the wiring is tight, it’s possible that the thermopile is faulty. In that case, the thermopile will have to be replaced. You’ll have to remove the main burner, isolate the thermopile, and replace it. You can do it yourself or hire a qualified technician to do it.
If a faulty safety magnet device is causing the issue, the gas control thermostat needs to be replaced. The connections to the gas control thermostat will have to be removed before you can replace it.
I have a detailed guide on how you can replace the thermostat yourself. Check out my Rheem gas water heater thermostat troubleshooting guide to learn all about it. Again, the choice is up to you. You can always hire an expert if you don’t feel like doing the task yourself.
The gas control thermostat will also have to be replaced if the thermostat shut-off device was tripped. If it’s the combustion shut-off that was tripped, hire a qualified technician to solve the issue.
Besides all that, the pilot light can also keep going out in your Rheem water heater. There could be several reasons behind it. Check out my Rheem water heater pilot light-outs guide to know more about this topic.
07. Main Burner Won’t Light Or Stay Lit
First of all, the pilot light must be lit for the main burner lighting to even be a consideration. So, the main burner not lighting up can also be caused due to the same issues that won’t light the pilot.

If your pilot won’t light or stay lit, solve it first following the two previous sections. Then, you can move on to the issues that won’t ignite the main burner.
The reasons why the main burner won’t light or stay lit are:
- Wire connections aren’t completely secure.
- The damper is not opening.
- The combustion shut-off device was tripped.
- Faulty gas control thermostat or tripped gas control shut-off device.
How To Fix:
First, inspect all the wiring connections in your heater. All of them must be tight for the heater to work properly. The heater is an integrated unit and if any of the wires come loose, the main burner may not light.
You can hire an electrician if don’t want to do it yourself. Once you tighten all the wire connections, check if the main burner works. If it does, you’ve solved the problem. Otherwise, you need to keep on diagnosing.
Secondly, you have to check whether the damper is opening. If it’s not opening, it could be due to loose wire connections as well. You’ll have to tighten the connection in that case.
However, there could also be issues with the flue damper installation. The flue damper switch can also be faulty. Two flashes with a three-second pause on your gas valve indicate this issue. You’ll have to replace the flue damper assembly in these situations to solve the issue.
You already know what to do about the other issues from the previous sections. Here’s a reminder – consult an expert if the combustion chamber was tripped. If the gas control thermostat is faulty or the shutoff device is tripped, the thermostat will also have to be replaced.
08. Water Is Too Hot
The hot water coming out of the faucet is a serious issue as it can even cause scalding. So, you need to become immediately aware and take action if you’re facing this problem.
When the water is too hot, this issue is caused is usually caused by one of the two following reasons:
- The thermostat is set too high.
- The thermostat is faulty.
How To Fix:
If someone has accidentally set the thermostat too high, you can dial the temperature down. Just adjust the control knob to your desired temperature setting and the problem will be solved. I’ve already shared the temperature guide so that you can set your thermostat to the right temperature.
But it’s also possible that the gas control thermostat itself is faulty. In that case, you’ll have to replace it with a new one. Once you do these things, you should get normal hot water from your heater without any issues.
09. Noise From The Relief Valve
Hearing a popping or draining noise from the relief valve is never a good sign. It indicates the build-up of pressure in the tank due to the thermal expansion in a closed system.

How To Fix:
As it’s a serious issue, you don’t have to do anything here. Don’t even attempt to operate the valve as it can cause more issues. Consult an expert immediately and stop using your heater in the meantime until this issue is resolved.
10. Rumbling Noise
It’s common to hear a rumbling noise from your water heater when sediment has built up in the tank. If you live in an area where hard water is supplied, you’ll face this issue more often.
As the minerals settle on the bottom of the tank, it makes a rumbling noise. The water will also start to turn brownish and smell bad if you don’t do something about it soon.
How To Fix:
Thankfully, fixing this issue won’t take much work. All you have to do is drain your tank and it’ll be solved. Follow these steps to drain the tank:
- Close the main gas shut-off valve to cut off the gas supply to the water heater.
- Open a hot water faucet so that the tank gets filled with cold water. It’ll protect you from a scalding injury.
- Wait for the tank to cool down and turn off the cold water supply.
- Open a hot water faucet to relieve the pressure from the system.
- Attach a garden hose to the drain valve and place the other end where you want to get rid of the water.
- Open the drain valve and wait until the tank is drained.
So, that’s how easy it is to drain the water from your tank. Once that’s done, you’ll reverse engineer the above steps and turn on the gas valve. You may have to do it once or twice a year depending on the hard water that’s supplied in your area.
What To Do When You Have A Bad Drain Valve?
You won’t be able to drain the water from your tank if you have a bad drain valve. The most obvious sign of a faulty drain valve is when it’s leaking. It’s common for plastic drain valves to break often and go bad.

Besides that, the drain valve could have terrible water flow and take a long time to drain the water. It could also not drain any water at all. All these situations point to a drain valve that has outlived its utility.
You need to replace the drain valves if you’re facing any of the problems stated above. Check out my Rheem drain valve replacement guide to learn how you can do that in detail. Hopefully, the rumbling noise will go away once you’re done with the replacement procedure.
11. Water Leaks
I’ve already gone over leaks from the hot water faucets. If you leave any of them open, the hot water will go out through them. So, you’d get less hot water when you actually need it.

But a more dangerous form of water leak is when the link originates from the heater itself. You’d get very little hot water when there’s a leak within your water heater.
Sometimes, you’d see a puddle of water around your water heater when there’s a leak. There are some common problem areas that are responsible for most water leaks. Some of those points are:
- The pipe connections are at the top of the tank.
- The drain valve.
- The T&P relief valve.
- Gas control thermostat.
- Inner tank.
How To Fix:
The right solution depends on the leak source. For example, if the leak is coming from the pipe connections, it would most likely be an easy fix. You’d have to tighten the leaky pipe connection and that would do the trick.
But the worst-case scenario is when the tank is corroded from the inside. In that case, you’d have to replace the entire tank. So, upgrading to a new heater altogether may make more sense for you in such situations.
You’d have to check all those points and feel for the water leaks if it’s not visually clear. I have a dedicated guide on stopping Rheem hot water leaks that’ll walk you through how you can solve this issue.
12. Failed Ignition Lockout
Your water heater often goes into lockout mode if it has tried to light up multiple times and failed. There could be many reasons behind this issue. However, the most common culprits are:
- Gas supply issues.
- Flue damper issues.
- Tripped thermal cutoff device.
- Pilot light issues.
- Defective gas control thermostat.
- And more
How To Fix:
The right fix depends on the problem that’s causing the issue. If it’s due to the lack of gas supply or bad gas pressure, you’d have to correct it. If there’s anything wrong with the pilot light, you’d have to find out the root problem and fix it.
I have a dedicated guide on getting the Rheem water heater out of lockout mode that covers these problems and solutions in detail. Check it out and you’ll find everything you need to know on how you should tackle this issue.
What Does It Mean When Your Rheem Water Heater Has No Status Light?
The status light in your Rheem water heater only comes up when the pilot in your water heater is lit. So, if the status light isn’t lit, it means that the pilot isn’t also lit.

The obvious solution here is to relight the pilot. When you light the pilot, the status light should start flashing again. If the status light starts flashing and calls for heat, that indicates normal operation of the water heater.
But what if you can’t relight the pilot even after following the right i