
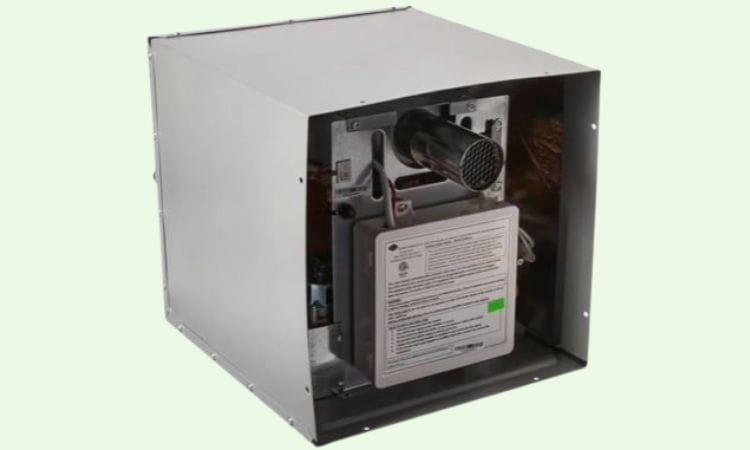
Girard RV Tankless water heater is a high-tech appliance in the row of RV models that provides an endless supply of hot water on demand. Because of its complexity, your tankless water heaters require regular maintenance to ensure long-term service life and reliability.
The general Girard tankless water heater maintenance task involves flushing out the water heater to prevent deterioration from the system due to scale build-up. Also, you need to examine and clean out the exhausts, air filter screen, water flow sensor, blower motor, and gas valve weekly or monthly to ensure optimal performance.
But that’s not the end here! Let’s explore the ins and outs of preventative maintenance for your Girard tankless water heater to keep it in peak condition.
Table of Contents
Girard Tankless Water Heater Maintenance Checklist
Here is the complete checklist on how you will maintain your Girard RV tankless water heater:
| Before or after every use | # Before or after every use make sure you have cleaned the exterior of your Girard tankless water heater. Take a damp washcloth and wipe the heater’s exterior housing. Avoid using cleaners for cleaning since some products are flammable. # Before every use, make sure you have connected your water heater to a properly grounded 12V DC electric power system. |
| Once a week | # Remove the front cover from your tankless unit once a week and check for debris and combustible materials present in the area of the burner and the gas control. # Inspect the gas & water shut-off valve weekly to check for any obstructions. Remove the obstructions to ensure a fluent gas and water flow to your unit. |
| Once or twice per year | # Above all, inspect the heat exchanger for the lime and scale build-up. For instance, you need to descale and flush your RV tankless water heater at least once a year. # It would be twice a year if you live in an area with hard water. |
| Once every six months | # Along with flushing, your water heater needs a fresh supply of air to function. Thus, inspect the exhaust tube outlet, vents & air inlet screen once every six months. Take proper cleaning materials and clean out the stuck debris and hard particle from them. # Inspect the interior of the heater for any loose and damaged wiring to the control board. Tighten the loose wire and replace the deteriorated one. |
| Annual inspection | # Besides, I strongly recommend hiring a professional once a year to inspect other elements of your tankless water heater like the pressure switch, blower motor, control board, gas valve, and so on. |
How To Maintain Girard Tankless Water Heater? [Step-By-Step Instruction]
Typically, a tankless water heater doesn’t require as much attention or replacement parts if we compare it with a tank unit. But certainly, that doesn’t mean we just leave our unit without maintenance.
It is essential to inspect and clean out the water heater regularly to maximize its performance and service life.
Here is all you can maintain your Girard RV tankless water heater with the needed step-by-step directions and schedule. Let’s start!
01. Descale & Flush Your Water Heater Twice Per Year
In your Girard tankless water heater maintenance routine, your first duty would be descaling and flushing your unit at least once or better twice a year. This is even important to maintain the efficiency of your water heater, especially if you are living in a hard water area.
During the heating process, the water travels through the water heater and leaves naturally occurring minerals like calcium, lime, or magnesium. RV tankless water heaters, especially on-demand tankless systems are quite vulnerable to these minerals and allow drying after long uses.
Consequently, the minerals form into hard particles and adhere to the interior components of your system degrading the efficiency of the water heater. Also, you may need to pay more through your utility bill.
As a solution, you need to be regular in descaling and flushing your water heater. Don’t wonder if you are new to your water heater.
Here I’m covering the details to get rid of all the built-up calcium deposits and scale from your on-demand RV tankless water heater.
How To Flush Girard RV Tankless Water Heater?
Go through the step-by-step procedures and directions to flush your Girard tankless water heater:
Step #1: Shut Off The Inlet & Outlet Water Valves
As for the first step, turn off the power and gas supply to your water heater and allow enough time for the heater to cool properly. Now you need to shut off the water flowing into your system.
For instance, shut off the inlet and outlet water valve for your on-demand RV tankless unit. The valve lever should be perpendicular to the pipe.
Step #2: Connect The Hoses
With the water turning off, take the hoses for cleaning, remove the service port caps from the valves, and attach the hoses.

Here you can use pliers to make the valve and hose connection watertight.
Step #3: Connect The Hoses With the Circulation Pump
When all is done, you will need a circulation pump to flush your water heater. Connect one end of the inlet hose with the circulation pump and place it into a bucket.

Now attach the hose to the discharge side of the pump. Then simply place the outlet hose into the same bucket.
Step #4: Add Cleaning Solution
When all the setup is done, you need a cleaning solution. In the market, you will find various types of descalers to clean out the tankless water heater. Purchase an effective one and add it to the bucket.

In case you don’t have a cleaning solution in your hand right now, 2 to 3 gallons of vinegar instead of that.
Step #5: Open The Valves
Now open the valves and start the pump. It will allow cleaning agents and water to run through your system. After one circulation, turn off the valves and let the cleaning solution sit in the system for a few minutes.
Then open the valves and let it run again. Now let everything circulate for at least 30-45 minutes or better go through the instruction that comes to your cleaning agent.
Step #6: Flush Out the Cleaning Agent
After that time, turn off the pump and both valves to stop the circulation. Disconnect the inlet valve hose. Keep the hose connected to the outlet valve and turn on the inlet valve. It will push water up the system and flush out any remaining cleaning solution from the system.
Let it continue for 5 to 10 minutes. When done, remove the hose and turn off the inlet valve again. Finally, reconnect everything back to the way it was and turn on both the water and the gas valves.
02. Check For Obstruction To The Air Flow Once Every Six Months
It is another major factor that you need to examine once or twice every six months. Along with the electric and gas supply, your RV tankless water heater needs a steady airflow to continue the combustion process without any distraction.
If there is any blockage to the air supply of the unit, there will certainly be a lack of oxygen which impacts the ignition process as well. Consequently, your water heater won’t run at peak efficiency and you may encounter no hot water issue in your unit.
At the very least, it will be a waste of money to burn more fuel for less heat.
Also, using vents, the water heater exhausts fumes and heat outside. If the vents become blocked, there is a huge fire risk as well.
What To Do:
Here is all you need to need to do to ensure fluent airflow throughout the system:
i. Clean The Exhaust Tube Outlet & Exhaust Collector
At the very first step, you need to inspect the exhaust tube outlet and exhaust collector for any blockage. You will find it inserted through the door opening and extends to the clearance hole.

Ensure the tube is free and clear of any obstructions like leaves, insect nests, and others. If not, take a vacuum cleaner and vacuum to remove any remaining debris.
ii. Clean The Filter Screen Inlet
There is an air filter screen inside of the heater that helps to screen out impurities from the heater before it’s heated. The filter tends to be clogged with dirt, insects, and other debris that can disrupt the airflow. Thus you need to clean it on a regular basis, otherwise, it won’t be able to do its job.
Anyway, inspect the filter screen, take it out, and clean it using a soft brush. You may use soap and water for better cleaning. When done, rinse thoroughly and put it back in place.
iii. Inspect The Pressure Switch
The pressure switch is another essential air-providing device in a tankless water heater that helps to draw air into the system and verifies the blower is operating at speed.
Basically, when the air from the blower passes over the Petit Tube inside the blower housing, the pressure switch closes a circuit, allowing the control board to send a voltage to the igniter.

Anyway, if the switch malfunctions, you may run into an error code E8 in the remote display. Thus regular maintenance of this switch is a must. It’ll be better to inspect the switch at lead once or twice a year.
Here is all you need to do to examine a pressure switch:
- First up, remove the mounting screws of the switch to get access to this component.
- Check for integrity and connections of the switch hose. Check for the integrity of the Petit Tube in the blower housing as well. Make sure the mounting nuts are secured and the tube is facing away from the blower wheel.
- Also, make sure that the wiring connection to the switch and control board is secured enough.
- Clean out the debris from the pressure switch hose and pipes.
- If needed, replace the switch with the help of a professional.
03. Inspect The Interior Surface For Faulty Wiring Connection Once A Year
Along with all the above steps, you should inspect the interior surface of your Girard tankless water heater housing for any cracks or damaged parts. You need to ensure that both electrical and plumbing connection is secured and safe.
Also with proper maintenance, you will need to make sure that all the wiring connections in the interior surface are firmly in place and there are no signs of chafing and cracks on the insulation.
Let’s know more about how you will examine the interior of your heater housing:
Safety First!
Before you examine or touch any of the wiring or electrical connections, I recommend turning off the power to your heater first. If needed, switch off the appropriate breaker that is powering your heater.
Also, it’ll be better to use an electrical voltage tester to ensure that the circuit is off. Now start inspecting!
i. Fuse: Remove the front panel and you will find a fuse just at the front. You need to verify that it is not blown. Also, verify the condition of the power wire connector for incoming 12 VDC power to the control board.
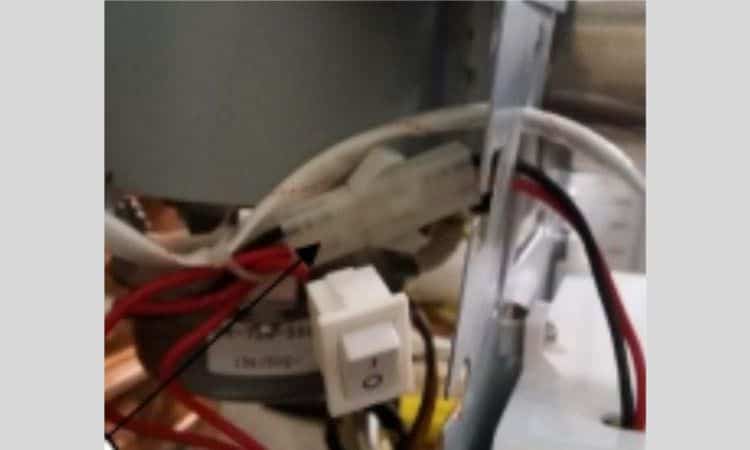
ii. On/Off Switch: Just above the fuse, there is a heater On/Off switch that controls the power to your water heater. Inspect the switch condition and make sure it is in perfect well-working order. Especially, inspect the 12 VDC red wire to the switch to ensure that there are no cracks and damages.

iii. Control Board: Besides the fuse and power switch, you should inspect the control board of your water heater and verify its condition.
First up, while operating the heater, make sure you’ve connected your tankless unit 12VDC electrical power system. Remember, the heater won’t turn on when the input voltage drops below 10VDC, and in that case, you will find a red LED illuminated on the control board.
Thus, you always need to confirm good power and ground to the control board and make sure the green light is on.

Next, figure out the deteriorated wirings to the board. Fix it or if needed replace it with the help of a professional.
Before replacing the control board, it’d be better if you check whether you have a warranty for this part. It will save you the cost of the replacement part or at times labor charges as well.
iv. Igniter Wirings: You should inspect and test the ignition pack of your Girard tankless water heater at least once or twice a year to check its efficiency. Remember without the proper operation of the igniter and burner assembly, your Girard RV tankless water heater won’t light and ultimately, the system will fail to provide the hot water as it should.
Anyway, here I’m providing some pro tips you can apply to examine your igniter without the help of a professional. Check it out:
- Always check for sparks at the igniter tip. If it is dim, be sure it is time to check the igniter visually.
- For that, inspect the igniter for obstructions or debris first. If so, clean it out with sandpaper.
- Now examine the spark igniter cable between the control board and the igniter. Here, you will find spade-type connectors between the board and the spark probe assembly. One is ground and one is high voltage. Make sure it is firmly attached in place and there are no shorts in the connection.

If you don’t get enough about this element, I recommend hiring a professional at least once a year to examine the igniter and burner assembly for you. He will better suggest to you whether it needs any repair or replacement.
04. Annual Preventative Checks
Along with all the above steps, there are several checks that you need to do on an annual basis. For instance, you may consider hiring a professional for your assistance or go through our suggestions below to inspect each of the elements by yourself. Let’s start:
i. Blower and Motor:
It is essential to inspect the condition of the blower motor of your Girard tankless water heater once a year. After removing the front panel, you will find a 4-wire variable speed brushless motor that operates with a 24VDC pulse width modulation system.
That means there is a voltage at all 4 wires on the CN1 plug while running the motor.

Thus whenever you will inspect the blower assembly, measure the proper voltage reading at the CN1 connection of the control board. Also, clean out the debris in the blower assembly.
ii. Pressure Relief Valve:
The pressure relief valve is another major element of the Girard tankless water heater that allows to release of air from the heating chamber. By doing so, it prevents excess pressure buildup in the system and consistent water temperatures. You need to test the pressure relief valve at least once a year.
But before handling the valve, I highly recommend turning off your water heater first and let the system cool properly.
Now, when you are sure the hot water outlet is cold, simply lift the lever on the top of the valve to release the extra pressure from the system. But it is necessary to take extra precautions while doing so as the water released under pressure will be extremely hot which would cause severe burns.
iii. Flame Inspection
As with other inspections of the system, you need to visually check the flame to ensure proper operation. This should be added to your annual maintenance routine. Observe the flame through the viewport and look at the burner under the edge of the heat exchanger.

Ensure the flame is stable and blue in color and without any yellow or orange appearance, indicating normal combustion. If not, be sure it’s time to service your tankless unit with a professional.
iv. Gas Valve & Manifold Fuel Pressure
Along with the electric supply, your on-demand water heater requires a fluent flow of gas to the system for proper ignition. Thus make sure you have checked the following:
- Check for fuel amount in the propane tank regularly and refill it if needed. After refilling, purge the air from the LP tank and bottles correctly.
- Check the gas hose as well to see whether it is bent. Straighten the bent hose.
- Inspect and clean out the stuck debris from the gas lines.
- Also, it is essential to check for leaks in your propane system. If you find any leakage, fix the leak as soon as possible.
- Inspect the gas line fittings from the inside. Make sure the screws to the fittings are secured enough but incredibly tightening is not recommended.

Besides all these, you need to inspect the gas valve connection to your tankless systems once or twice a year.
When you remove the front cover from your heater, you will find two gas valve connections at one assembly one is an On/Off solenoid valve and the other one is a linear valve. If any of the valves fail to open, then no gas will be supplied to the burner.
Thus, examine the gas valve condition to ensure that they are in perfect working order. Besides, you can measure the output gas pressure of the gas valve.
It will give a reading of 1.5” WC on low heat and 7.8” WC on high heat. If needed, contact a licensed professional to do the job for you. Or, you can contact Girard tankless water heater customer service for any replacement part.
05. Winterize Your Tankless Water Heater At The Start Of Winter
It is essential to winterize your Girard RV tankless water heater before storing it in the harsh winter weather. Even though an on-demand water heater doesn’t include a tank, still you need to winterize your tankless water heater to avoid further repair and damage.
Let me explain clearly! Though there is no tank system in your on-demand water heater, still there may be a small amount of water in the system and waterpipes.
During freezing winter weather, the remaining water can freeze up which affects the overall plumbing system of the heater. Also, there are chances to crack the pipes from drying out and cause problems down the line such as leaking.
Proper winterizing your tankless water heater prevents that from happening.
How To Winterize Girard RV Tankless Water Heater?
Go through the included instructions step-by-step to winterize your tankless RV water heater.
Step #1: Before beginning the winterizing process, turn off both the gas and the electrical power supply to your water heater.
Step #2: As per the instructions in the Girard manual, you need to remove all water from your water heater for winterization. To do so, turn all the hot water faucets and showers on. Make sure you’ve drained all the water.
Step #3: If needed, use compressed air to generate a strong stream of air that will help to push water out of the system.

Pump the compressed air until you are able to drain the water from the lowest point in the plumbing lines.
Step #4: After the system has drained, run the built-in antifreeze through your RV water pipes according to the manufacturer’s instructions.
Step #5: When done, you can consider your Girard RV tankless water heater to be safely winterized.
FAQs:
At what temperature will my Girard RV tankless water heater freeze?
Generally, your RV tankless will more likely tend to freeze below 32 degrees Fahrenheit (0 degrees Celsius). In your Girard model, you will find built-in anti-freeze protection that keeps the unit safe from potential damage from freezing temperatures.
Does my RV tankless water heater need to be flushed every year?
Yes! It is! Flushing your tankless water heater should be a part of your yearly maintenance. It will prevent the buildup of minerals and sediment in the system and extend the water heater’s lifespan.
Can I use my Girard RV tankless water heater in freezing condition?
Though it is not quite impossible to use an RV tankless water heater in freezing conditions, you may need to consider the potential damage to your system if you do so. Also, it will be hard for the heater to maintain the water temperature, and the better chance is your unit will freeze at all.
In Closing
Certainly, there are a few important Giraran tankless water heater maintenance tasks that you need to perform on a regular basis to keep your unit running efficiently.
Among them, a large part of preventative maintenance includes annual flush. Beyond flushing, your water heater requires a few more additional maintenance which I’ve nicely covered throughout our guide. Make sure you are performing all the tasks along with your daily schedule.
Remember, if your RV tankless water heater isn’t properly maintained, it’s obvious you may encounter several issues in your unit while operating.
Don’t worry! Here we have a comprehensive guide for you that assists you in dealing with the common problems with Girard tankless water heaters.