
Forgetting to clean its filter might seem small, but it can cause big problems. Your heater might not work well, break down, or give you dirty water. But how to clean Takagi tankless water heater filter?
- First, you’ll have to drain the unit and then remove the water filter.
- Now, take a brush and clean the filter.
- Finally, when cleaning is done, reinsert the filter
I know you’ve got the basics but the whole process is crucial. Don’t worry, in this article, I’ll share the Takagi tankless water heater filter cleaning process with a step-by-step guide. So, read on till the end.
Table of Contents

Function And Purpose Of A Water Heater Filter
Before we go deep into the process here is some additional info about a hater heater filter.
Water heater filters prevent minerals like calcium and magnesium from sticking to heating elements. They use a special material to capture these minerals to avoid scale buildup.
In tankless water heaters, filters protect small openings from mineral accumulation. It ensures proper water flow. Without filters, scales can hinder heating, increase energy use, and damage the system. Regular maintenance of the filter is crucial to prevent scale, enabling the water heater to work efficiently and provide a steady supply of hot water.
Why Do You Need To Clean The Filter?
The water filter in your Takagi tankless water heater is designed to prevent debris and particles from entering the unit. Over time, these filters can become clogged with sediment and impurities from the water supply. It potentially reduces the efficiency and even damages the heater.
Aside from that, a clogged filter can prevent the heater from turning on or heating properly. So, regularly cleaning the filter is essential to maintain the unit’s optimal performance.
How To Clean Takagi Tankless Water Heater Filter?
Cleaning the Takagi tankless water heater generally comes with 2 crucial steps. Here the first crucial step is draining the unit. Once it’s done you can move on to the cleaning part. So, I’ll be discussing the process in 2 different segments. So, read on.
A Guide On Draining A Takagi Water Heater
Here is a step-by-step guide on how to drain a Takagi water heater safely and effectively.
Step 1: Prepare For The Process
Before starting the draining procedure, gather the necessary tools and ensure a safe environment. Let’s learn the pre-procedure tasks.
- Prepare a container (Bucket or pan) to collect the water from the unit’s drain plugs.
- Use appropriate gear such as gloves and goggles for protection.
- Locate the manual gas shut-off valve and the cold water inlet shutoff valve.
- Always shut off the gas supply to the unit.
Step 2: Turn Off The Power To The Unit
Here’s the most crucial safety part. Turn off the power to the Takagi water heater and allow a few moments for the system to power down completely.
Step 3: Initial Power Cycle
Turn the power back on for 30 seconds. It’ll allow any residual power to dissipate.
Step 4: Close The Cold Water Inlet Shutoff Valve
Locate and close the cold water inlet shutoff valve. This action prevents additional water from entering the heater during the draining process.
NB: If your heater is connected to other heaters in an Easy-Link or Multi-Unit System, turn off the water valves going into and out of the heater to separate it from the others.
Step 5: Release Initial Pressure
To release any initial pressure within the system, open all hot water taps in the house or use the pressure relief valve. Once the water flow stops, close all hot water taps.
Step 6: Check For Isolation Valves And Open Them
Are there isolation valves installed on the unit? If they are, open the drains to allow water to drain from the unit.
Tip: Before you begin, position a bucket under each isolation valve drain port. In cases where hoses are connected, a single bucket will be enough. Identify the two drain ports; one on the COLD line and the other on the HOT line.
Step 7: Remove Drain Plugs (If There Is No Isolation Valves)
If isolation valves are not installed, locate the two drain plugs (large and small) on the unit. Unscrew both drain plugs to start water drainage.
Step 8: Preserve O-Rings
As you remove the drain plugs, be cautious not to lose the o-rings attached to them. These o-rings are important for proper sealing. (This step is for the 910/910 ASME, 140 Indoor/Outdoor and relevant model)
Step 9: Open The Main Drain Port

This is a crucial step. Here first, locate the drain port. Check out the given image. It is positioned on the far left-hand side. Now turn the main drain port counter-clockwise for two turns. (This step is for the 240 Indoor/Outdoor, 340 Indoor/Outdoor, and 540 Indoor/Outdoor models)
Step 10: Allow Water To Drain
Once the drainage process is initiated, wait a few minutes to ensure that all the water has completely drained from the unit.
Step 11: Maintenance And Completion
After ensuring all the water has drained from the unit, clean the drain plugs and filters. Check for any sediment or debris and remove it if present.
Safety Measures and Recommendations
- Always prioritize safety by wearing appropriate protective gear.
- Ensure the gas supply is shut off before starting the process.
- Be cautious of hot water and steam during the draining process.
- If unsure about any step, consider consulting a professional or the manufacturer’s guidelines.
A Step-By-Step Guide On Takagi Tankless Water Heater Filter Cleaning
Now I’ll provide a comprehensive guide on how to clean the filter of a Takagi tankless water heater.
Step 1: Drain The Unit
Just check the previous section on draining the unit for detailed instructions on how to do this.
Step 2: Locate And Remove The Water Filter

The water filter is typically located within the cold water inlet of the Takagi water heater. To access it, follow these steps:
- Ensure that the unit is powered off and the gas supply is shut off.
- Find the cold water inlet, which is usually marked or identified in your unit’s manual.
- Carefully remove the water filter from the cold water inlet. You may need to use a wrench or pliers if it is tightly screwed in place.
Step 3: Clean The Water Filter
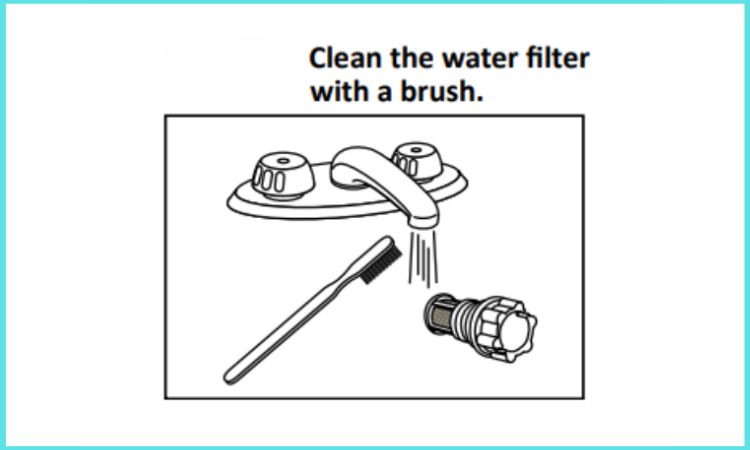
Once you have removed the filter, you can start the cleaning process. Here’s how to do it.
- First, check the water filter for any debris, sediment, or particles. Remember, these filters can vary in design, but most Takagi water heater filters are a fine mesh or screen.
- Use a small brush, like a toothbrush or a soft bristle brush, to gently clean the filter. Ensure you remove all debris and any visible sediment.
- For stubborn debris, you can rinse the filter with clean water. Avoid using any harsh chemicals or abrasive materials that could damage the filter.
Step 4: Reinsert The Filter
Once the filter is clean, it’s time to reinsert it back into the cold water inlet:
- Carefully align the filter with the inlet and ensure it is placed in the correct orientation.
- Securely screw the filter back into place. It’s essential to hand-tighten it only to prevent any damage to the filter or the inlet.
Take note that the filter strainer basket can be detached from the filter threads. If you separate them, make sure not to misplace the O-ring. Before reinstalling the filter, ensure the O-ring is securely in place. (For the 240 Indoor/Outdoor, 340 Indoor/Outdoor, and 540 Indoor/Outdoor models)
Step 5: Power Up The Unit
After successfully cleaning and reinserting the filter, you can power up the Takagi water heater. Hopefully, it’s now ready to provide efficient hot water once again.
Maintenance And Frequency Of Cleaning The Filter
So now you may be thinking about how often you should perform this cleaning process right?
It’s advisable to clean the water filter in your Takagi tankless water heater at least once a year. Again, some plumbers suggest cleaning every six months. But I suggest you clean even more frequently if you notice a decrease in water flow or a decline in the unit’s performance.
Regular maintenance will extend the lifespan of your water heater and ensure optimal performance.
FAQs:
How to flush a tankless water heater
Flushing a tankless water heater is essential for its maintenance. Firstly, turn off isolation valves and gas. Then, connect hoses, attach them to a circulation pump, add a cleaning agent, and open valves. Flush out the cleaning agent and reconnect all components for proper functionality. This process helps remove sediment and scale, ensuring the heater’s efficiency and longevity.
How often do you change the filter in a tankless water heater?
You should change the water filter in your tankless water heater at least every six months. But if you see less hot water flowing, change it more often. Doing this a lot keeps your heater working well.
How often should you clean a water heater filter?
You should clean your water heater filter once a year to remove dirt and keep your drinking water safe. However, sometimes the filter gets clogged even before the time. In such cases, clean the filter every 6 months or when necessary.
Final Verdict:
That’s everything about how to clean the Takagi tankless water heater filter. Cleaning the filter of your Takagi tankless water heater is a relatively straightforward process. And after reading the whole article I hope you’ll have no more confusion on this process.
Remember, cleaning the filter is important to keep things running smoothly and make sure you have clean hot water. So maintain the schedule and clear accordingly. To learn more about the Takagi water heater read my other blog on Takagi water heater standby mode.