
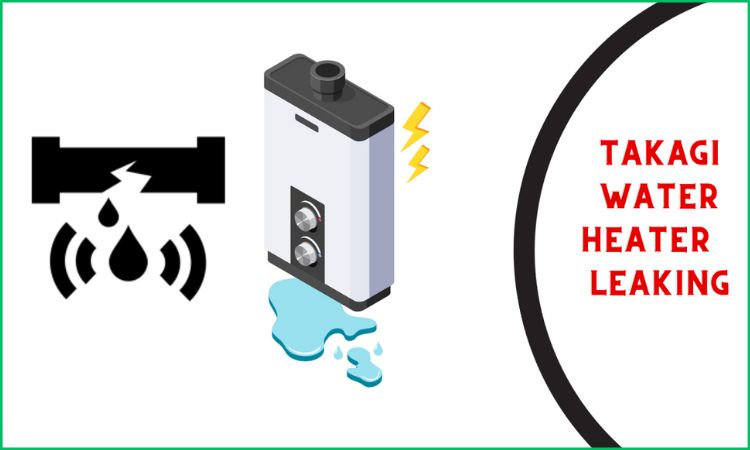
If you suddenly notice a pool of water under your water heater and there is continuous water leaking, it is normal to freak out. However, it doesn’t necessarily mean your water heater is broken. It can be fixed.
So, what causes the Takagi tankless water heater leaking?
A corroded or damaged heat exchanger is the culprit for your Takagi tankless water heater to leak. To resolve this issue, you have to replace the heat exchanger.
I have dealt with many Takagi water heaters with continuous leaks and replacing this part resolved the problem every time. So, before you get into serious and complicated Takagi water heater troubleshooting, give this article a try.
Table of Contents
What Is The Common Reason Behind The Takagi Tankless Water Heater Leaking?
The common reason for a Takagi tankless water heater to leak from the heat exchanger is damage or corrosion in the heat exchanger itself.
The heat exchanger is a critical component in a tankless water heater that is responsible for heating the water as it passes through the unit. When there is an issue with the heat exchanger, it can lead to leaks.
In this situation, you will notice that water is coming out from the water heater’s bottom continuously.
The heat exchanger can be damaged or corroded for many reasons as follows.
- When the air around the water heater is really dirty with things like dust, lint, sand, grease, or other impurities, these things can get inside the heater through the air intake. These contaminants can build up inside the fan and burner parts, causing problems with the flames that heat the water. This damages many parts of the water heater including the heat exchanger.
- If you have very hard water (above 7 grains of hardness or 70‐140 ppm), it can leave a chalky substance called limescale inside the water heater’s pipes. This scale prevents the heat from properly getting to the water and makes the inside of the pipes really hot. Eventually, this can cause the copper pipes in the heat exchanger to burn and develop leaks.
In the next segment, I am going to explain how to fix this water heater leaking issue in detail. It will help you with any of the Takagi water heater models you are using. That includes the following.
- CT-199
- H series
- HX3 series
- CX3 Series
- 910/910 ASME series
- Series 110
- 540P (Both Indoor and Outdoor)
- 140 Indoor and Outdoor
How To Fix The Takagi Tankless Water Heater Leaking?
To fix the Takagi tankless water heater leaking problem, you have to replace the faulty heater exchanger. This is a time-consuming and complicated process so read all the steps very carefully.
Tools Required:
- A pump-action bottle filled with degreaser.
- A sheet of sandpaper with a 100-grit rating.
- An air compressor.
- Needle-nosed pliers.
- A #2 Phillips screwdriver.
- A flashlight.
- Duct tape.
- At least three old towels.
Process:
Step 1: Preparing The Unit
The first thing you need to do is prepare your Takagi tankless water heater to work on it. To prepare the unit, you have to disconnect the power sources from the heater. Then you have to disconnect the gas supply as well.
After that, drain your water heater properly.
Step 2: Removing The Gas Assembly and Burner
This step requires several sub-steps. Here are those.
i) Take off the front cover of your water heater.
ii)Remove the Manifold Plate/Gas Valve Assembly in the following manner:
a. Remove the screws from the manifold plate. They’re wide screws on the edges of a metal plate.
b. Take out the brass gas valve screw.
c. Release the wire that secures the Easy-Link wires in place.
d. Remove the clear plastic tube you will find beneath the combustion chamber.
e. Carefully lift the manifold and gas valve assembly to separate it from the gas inlet, and let it hang. You will notice a small filter screen at the gas inlet. Be sure not to lose it.
iii) Now, you have to remove the burner assembly in the following manner.
a. Unscrew the five wide screws that secure the burner to the combustion chamber. Three are at the top, and two are at the bottom in the back.
b. Disconnect the rod assembly that includes the orange-colored flame sensor, yellow-colored AFR, and black-colored igniter wire.
c. Remove the burner. If it’s hard to remove, use pliers to grip the front of the burner between the oval air vents on the far left and right, then pull firmly. Pull it from the center, and it should come out more easily.
d. Examine the gasket for any damage. Minor surface tears are okay, but major separations are not acceptable.
iv) After that, clean the burner in the following way.
a. Make sure to protect the burner gasket from direct water pressure. If the gasket is damaged, contact the Technical Service Department.
b. Completely saturate the burner with a degreaser from the top, down through the slots, and the front openings until it’s wet.
c. Let the burner sit for 5 minutes.
d. Take the burner out of the solution, place it upright in a sink, and wash it with a strong stream of water down into the slots, starting from the back and moving forward. Make sure not to touch the gaskets.
e. Use compressed air to remove excess water from the burner after rinsing and check the gasket for any damage. Minor surface tears are okay, but major separations are not acceptable.
Step 3: Removing The Wires
To release the heat exchanger, you’ll need to remove various wire clips. Do it in the following way.
- There is a brown wire clip connected to the GFI. Find and unplug it.
- After that, look for white wires on the bottom left, and disconnect the ceramic heating elements.
- Locate the white bypass valve clip which is located on the left side of the combustion chamber with red/black colored wires. Disconnect it.
- Towards the upper left side, remove a blue connection from the overheat cutoff fuse.
- On the high-limit switch, there are two spade connections. Locate and remove them.
- Disconnect the igniter plug with purple wires and a blue plug at the bottom right.
- Along the bottom, unplug the connection going into the proportional valve with red and white colored wires.
Step 4: Removing The Fan
After disconnecting all the wiring, it’s time to remove the heater fan. The fan is secured with two screws. These screws are located on the bottom of the heater, and you can access them through two holes in the bottom of the case using a long screwdriver. Move the fan to the left to free it from the slots.
Step 5: Disconnecting The Waterways
If you haven’t already drained the unit, it’s the right time to do it. After making sure that the heater is drained properly, Unhook the waterway clips shown on the right. When removing the pipes from their sockets, put a dry towel in the bottom of the unit case to avoid water mess-ups.
Step 6: Removing The Heat Exchanger
Now it’s time to remove the leaking heat exchanger from the heater. Here’s how to do it.

- Take out the two screws located at the upper part of the heat exchanger.
- Now, the heat exchanger should be able to come out easily. If there are any wires still connected to the heat exchanger assembly, make sure to disconnect them so that the heat exchanger can be completely removed.
Step 7: Replace The New Heat Exchanger
Take out the new heat exchanger and carefully examine it to ensure that it is the right model and free from any damage.
Now, transfer the following components from the old heat exchanger to the new one:
i. Overheat Cutoff Fuse
ii. Plastic pressure port
iii. Freeze protection blocks
iv. Hot water thermistor
v. Silicon Vent Gasket
vi. Hi‐Limit switch
Step 8: Reassembling
As you are done replacing the heat exchanger, put the unit back together in the reverse order. Here are some important things to keep in mind:
- Make sure to reconnect all the wires. Keep the wires hanging in front of the unit; don’t push them to the back where you can’t see them, as you might forget about them.
- Check all the gaskets to ensure they are in good condition.
- Pay attention to the O‐rings on the gas and water valves, as well as the waterway clips.
- Reattach all the extra components that are secured by the manifold screws.
- When you’re done, there should be no leftover screws. Double-check to ensure everything is properly secured.
Now, replacing the heat exchanger is done and you should not get any more leaking from the Takagi tankless water heater.
Other Major Reasons For Water Leakage In Takagi Tankless Water Heater?
In my experience with troubleshooting water heaters, I encountered some other major reasons for water heaters leaking from time to time. Here are those reasons.
01. Faulty Pressure Relief Valve (PRV)
The pressure relief valve is designed to release excess pressure from the unit. If it’s damaged or improperly installed, it may leak water.
How To Fix It?
Replace the pressure relief valve if it is damaged or not functioning correctly. Ensure that the replacement valve is of the appropriate size and pressure rating. It is recommended to consult a professional plumber for the procedure.
02. Bad Water Conditions (Hard Or Acidic Water)
The quality of water can impact the longevity of a tankless water heater. Hard water, which contains high levels of minerals like calcium and magnesium, can lead to scaling inside the unit. Over time, this scaling can damage components and result in leaks. Similarly, acidic water can corrode metal parts, contributing to leaks.
How To Fix It?
Install a water softener to reduce the hardness of water. For acidic water, consider using a neutralizing filter or chemical treatment system. Regularly flush the system to remove accumulated scale.
03. Improper Venting
Proper venting is essential for the safe operation of a tankless water heater. If the venting system is not correctly installed or is obstructed, it can lead to back-drafting or improper combustion. Which will cause water heater components to deteriorate and potentially leak.
How To Fix It?
Ensure that the venting system is installed correctly and is free from obstructions. Follow the manufacturer’s guidelines for venting requirements. Consult with a professional if venting issues persist.
04. Condensation Issues
Tankless water heaters can produce condensation, especially in colder climates. If the condensate drain line is not properly installed or is clogged, it can lead to water leakage.
How To Fix It?
Check the condensate drain line for clogs and ensure it is properly installed. Clear any obstructions and make sure the drain line has a proper slope to facilitate drainage.
05. Loose Connections
Over time, vibrations and thermal expansion and contraction can cause connections to become loose. This can lead to leaks.
How To Fix It?
Tighten any loose connections, fittings, or joints. Consider using thread seal tape or pipe joint compound to ensure a secure seal. Periodically check and tighten connections as part of routine maintenance.
06. Corrosion
Corrosion can occur over time, especially in areas with hard water. Corrosion can weaken the structure and cause leaks.
How To Fix It?
Addressing corrosion may involve replacing corroded components, such as the heat exchanger. Consider installing a water softener to mitigate the effects of hard water. Regularly inspect the unit for signs of corrosion and consult a professional for repairs.
07. Temperature And Pressure Fluctuations
Rapid temperature changes or high water pressure can put stress on the unit. That can cause leaks.
How To Fix It?
Install a pressure regulator to maintain water pressure within the recommended range. If temperature fluctuations are severe, consult with a professional to assess and address the cause.
08. Improper Installation
Incorrect installation, such as using the wrong size of gas lines, venting issues, or inadequate clearance, can contribute to leaks.
How To Fix It?
Ensure the unit is installed according to the manufacturer’s guidelines and local building codes. Address any installation issues, such as incorrect venting, gas line sizing, or clearance problems. Seek professional assistance if needed.
09. Freezing Conditions
In cold weather, if the tankless water heater is not properly protected against freezing temperatures, the water inside the unit or pipes may freeze and cause damage. This leads to leaks when it thaws.
How To Fix It?
Protect the tankless water heater from freezing temperatures by insulating exposed pipes or installing freeze-protection devices. If the unit has already been exposed to freezing conditions, consult a technician to inspect for potential damage.
How To Prevent Takagi Tankless Water Heater Leaking?
If you maintain some tips and are a little careful, you can keep the heat exchanger in good condition for a long time. So, for the next time, follow the tips mentioned below to prevent your Takagi tankless water heater from leaking again.
i) Address Water Hardness
Find out the hardness of your water. If it exceeds 7 grains of hardness or 70-140 ppm, according to the Takagi water heater manuals, it’s highly recommended to install a water softener. Hard water can lead to scale buildup on the heat exchanger, which, over time, can cause leaks. It’s crucial to install a water softener in areas with hard water to mitigate this risk.
ii) Scale Prevention
Address the issue of scale buildup caused by hard water. Limescale tends to accumulate on the inside of the heat exchanger tubes at high temperatures, which inhibits heat transfer to the water and causes excessive heat within the heat exchanger copper.
Over time, this can result in burnout and leaks. Using a water softener, as mentioned earlier, can help mitigate this problem. Additionally, consider using descaling agents or periodic flushing of the heat exchanger to remove scale deposits.
iii) Air Quality Check
Ensure that the air quality around the tankless water heater is clean. Contaminated air with high levels of dust, lint, sand, grease, aerosols, or other contaminants can be drawn into the unit.
- Regularly clean the area by dusting and vacuuming to prevent these particles from being drawn into the unit. Pay particular attention to the immediate surroundings and vents.
- Ensure that the area where the water heater is installed has adequate ventilation. Proper ventilation helps in reducing the buildup of airborne contaminants. Ensure that vents and air intake openings are unobstructed.
- Depending on the environment, you may want to consider using air purifiers or filters in the vicinity of the tankless water heater to help remove airborne particles and maintain cleaner air.
iv) Regular Maintenance
Conduct regular maintenance on your tankless water heater. Ensure that all components are in good working condition and that there are no signs of scale or corrosion. Periodic maintenance can help identify issues before they become serious problems.
FAQs:
Why is my Takagi tankless water heater dripping water?
Your Takagi tankless water heater is dripping water due to a corroded or faulty heat exchanger. Hard water has minerals like calcium and lime. They build up in the heat exchanger, causing overheating and leaks. Replacing the heat exchanger will stop this problem.
Can a leaking hot water heater be repaired?
Yes, a leaking hot water heater can often be repaired, depending on the cause and extent of the damage. You may be required to replace the faulty part. It’s advisable to consult a professional plumber or technician for assessment and repair options.
Is a leaking water heater an emergency?
If the water is dripping infrequently and in a very small amount, it is not usually an emergency. But if the water heater is leaking constantly or in a huge amount, it is an emergency. Either way, you should address the issue as soon as possible.
How do I know if my water heater is leaking slowly?
To determine if your water heater is leaking slowly, look for visual pooling or puddles of water around the base of the heater. Slow leaks may result in a gradual accumulation of water at the bottom of the unit over time.
Conclusion
Here goes everything about the Takagi tankless water heater leaking issue. This article covered the reason, solution, and prevention for this leaking issue.
However, replacing the heat exchanger can be a very complicated task. So, if you are not experienced with heater repair, you should get help from a professional instead of trying by yourself.
Also, if you face other problems and notice error codes, check out our article on how to fix error codes in Takagi tankless water heaters.
That’s all for now. Goodbye!